Oh Oh Oh It’s Magic! Part1
April 28th, 2016
Using Houdini with the Unreal Engine
So I’ve been debating doing this one as a topic for some time now. On the one hand I think this tech is amazing and I want to tell everyone about the awesome possibilities it opens up and the massive boost to the workflow pipeline it allows. On the other hand I can’t deny that the licensing model might not be ideal for most new developers, and I can’t deny that there are some pretty big bugs still out there in Houdini Engine. That having been said I really like playing with this stuff and I decided to this post to gauge interest in this subject. If you want to see more of this let me know. Message me, upvote this post wherever you linked from, or just leave a comment if you want to see more of this kind of thing.
So where should I start? I began playing around with Houdini right after they made the Houdini Engine Indie edition free for developers (Note: They made Houdini Engine free, not Houdini itself) I had been very interested in Houdini for a while because procedural generation is one of my favorite topics and I loved the idea of using it to generate my models programmatically, but it was this video that pushed me over the edge and made me run out and buy a years license. (The magic, pardon the pun, starts about 2 minutes in. Also, yeah this is a unity example but it works in Unreal too.)
Houdini at GDC2015 | Rapid Level Creation in Unity from Go Procedural on Vimeo.
The idea of being able to write an asset in Houdini and then manipulate the parameters in engine was too good for me to pass up. I’ve found a ton of uses for it in the little time I’ve actually had to work with it. I’ve used it for stairs, pipes, walls, wires, anything I create once and suddenly have an infinite number of permutations of that same asset. This is a massive time saver for a one man development team.
Most of the tutorials I’ve found go about trying to build something specific and gloss over the meat of what you are doing in each node, so I figured it would be good to make this a node/technique based tutorial. So, starting with the basics, here’s a couple really useful techniques I’ve found.
- Creating a digital asset – Using Houdini in unreal is all about creating what Houdini calls Digital Assets and then importing them into Unreal to manipulate further. To start lets create some basic geometry. The part of the interface we will be using the most is the network view.
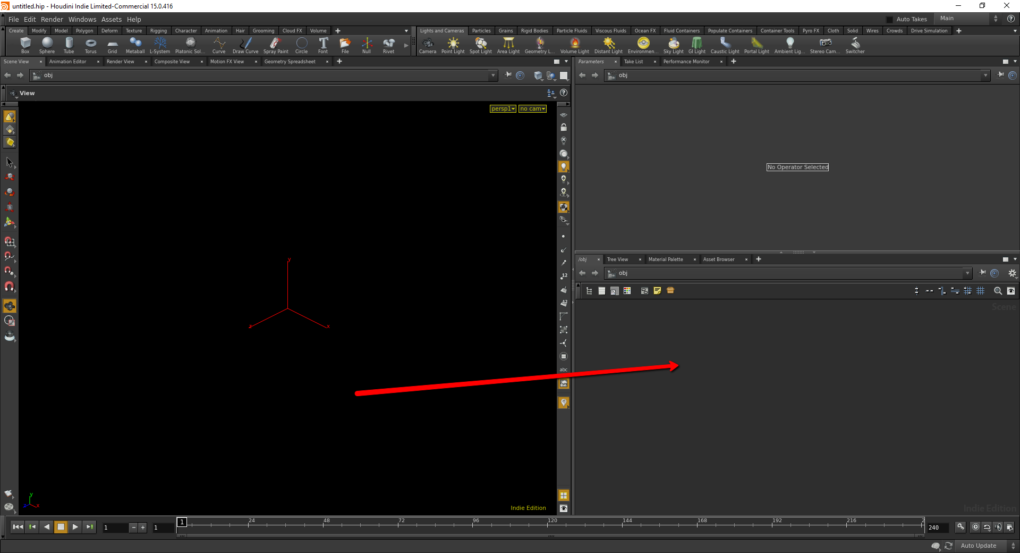
The network view really a just another graphical programming language. You connect outputs of one node to inputs of another. For our first asset we just want to make a cube so we really only need one node. Click the network view and hit tab on the keyboard. This will bring up a menu of nodes you can add. Frst add a geometry node. Double clicking the geometry node will step you inside of it. You can see how deep inside a series of nodes you are by the bread crumb trail it leaves at the top.
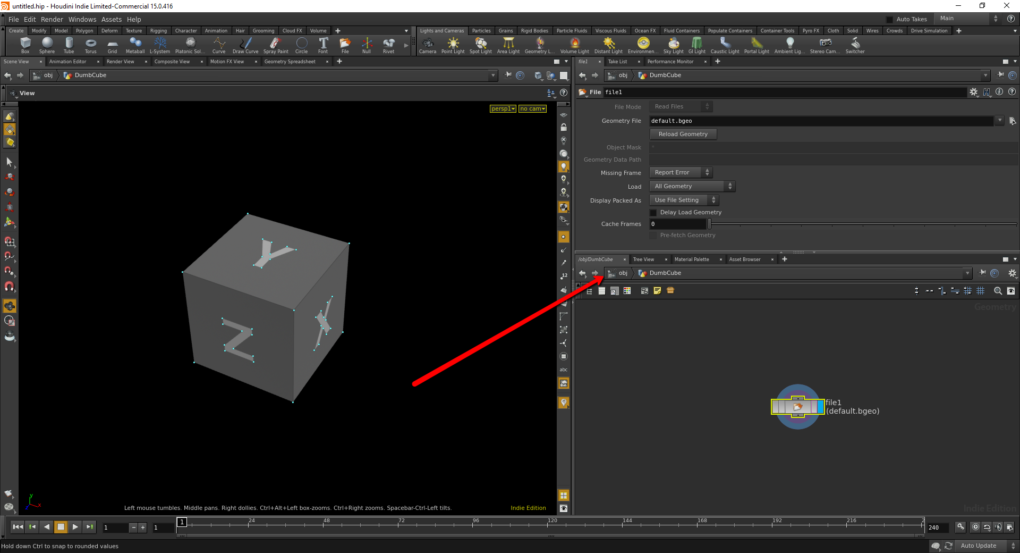 We don’t need the geometry object created it inside the geometry node for us, so delete that. Once again hit tab to add a new node. With the tab menu open you can type the name of the node you’re looking for for quick access. Add a new box node.
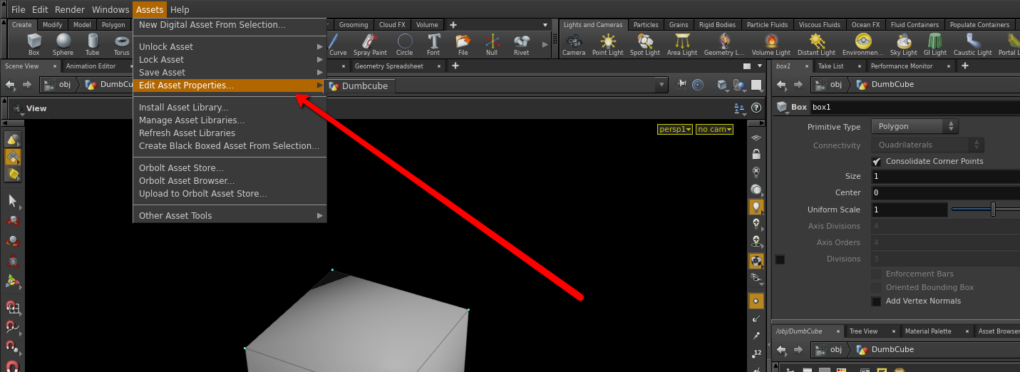
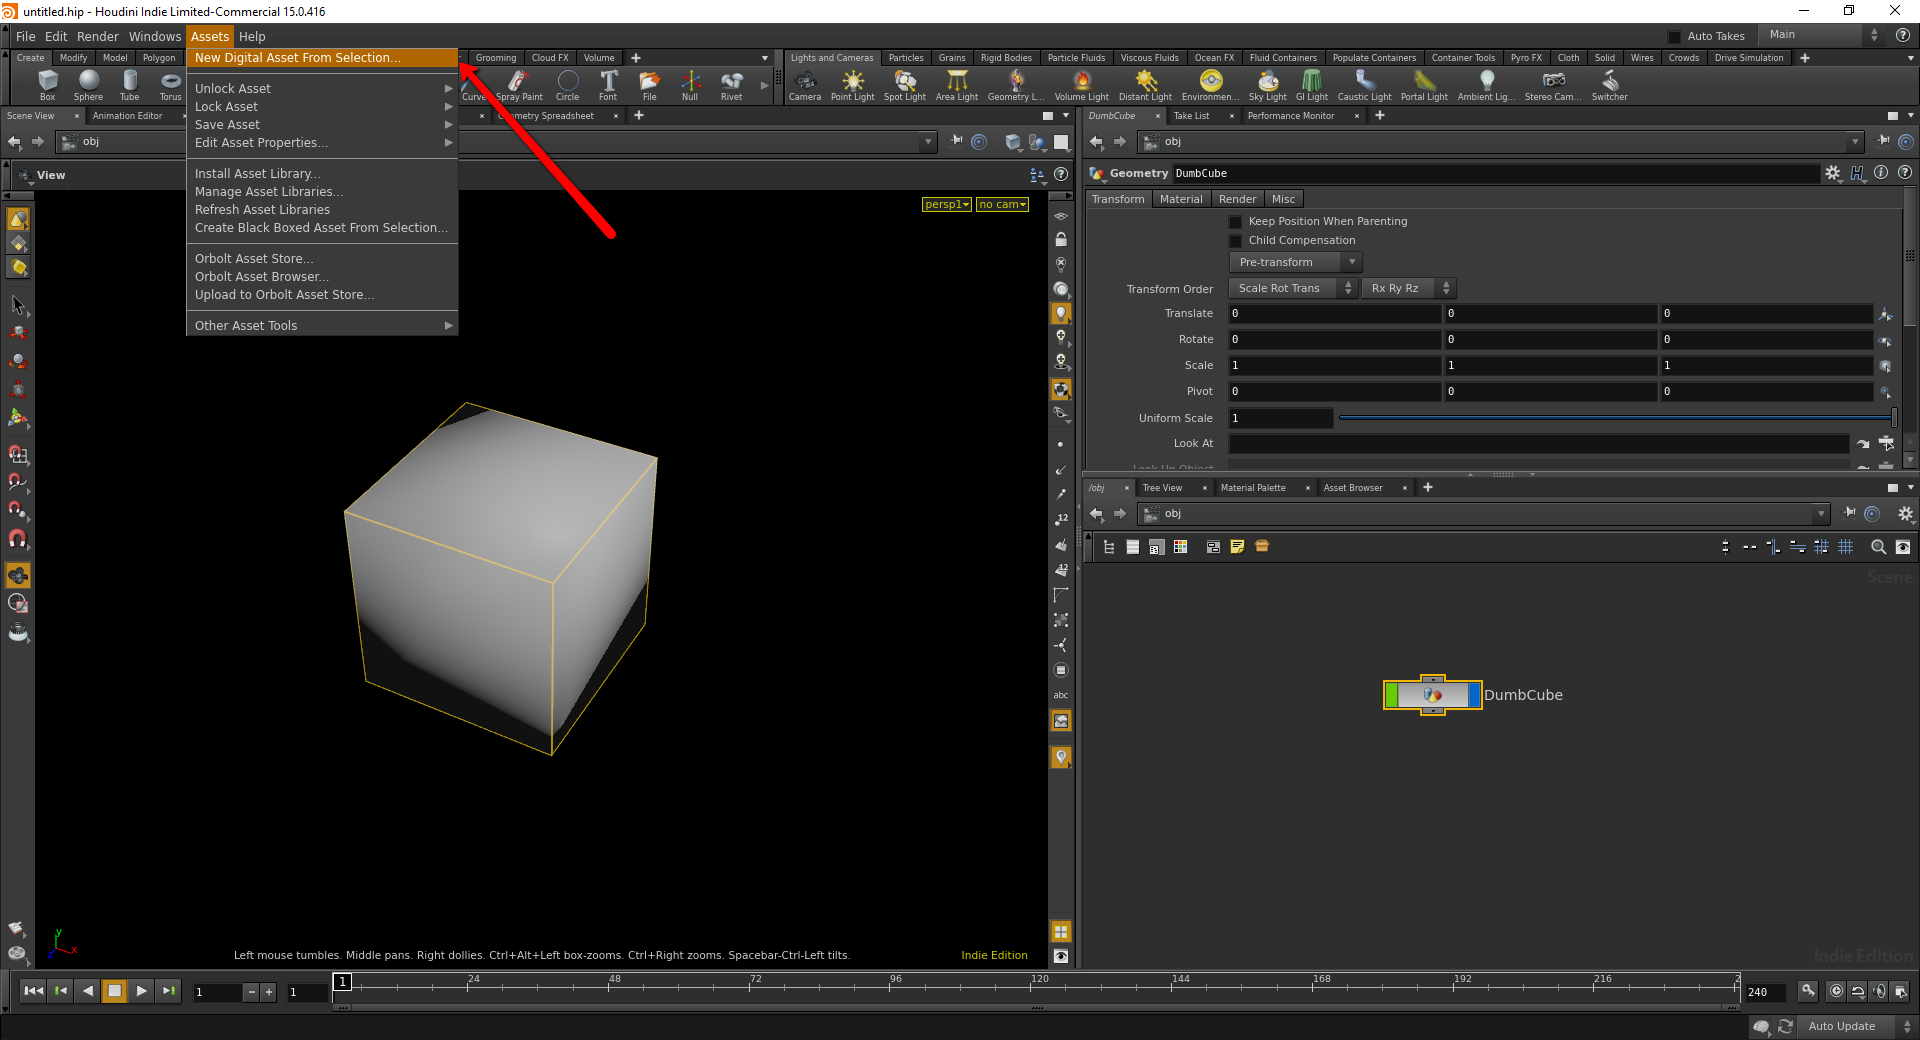
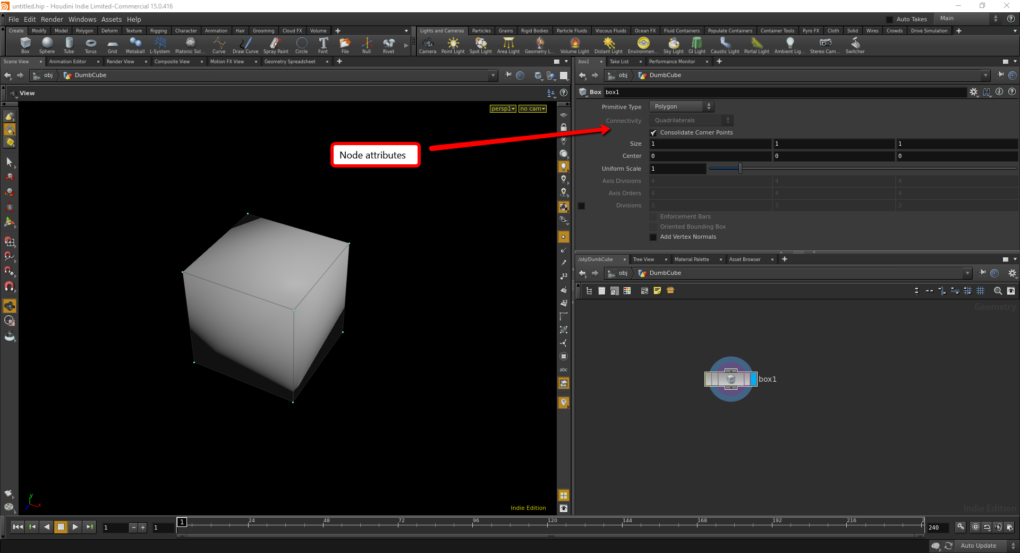 You’ll notice immediately that attributes for the box are available. You can change the size, scale center and type. To make these attributes editable in Unreal we need to turn this into a Digital Asset. To do that go back to the root level. Select your geometry node and then go to the assets menu and click “New digital Asset From Selection”.
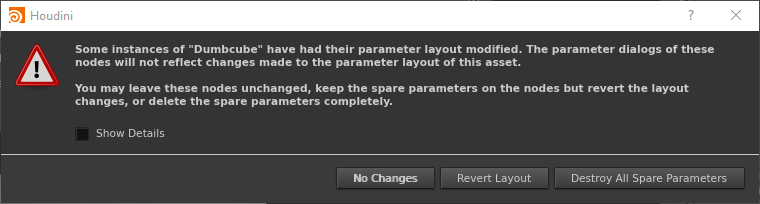
 It will ask you if you’d like to create a subnet first but for this example that’s unnecessary. Give it a name you’ll remember and a save location you aren’t likely to misplace. Click save and you’ll get this really cool scary warning dialog. I’d love to know more about this dialog but everything I’ve read so far says just ignore it and click “Destroy all Spare Parameters”
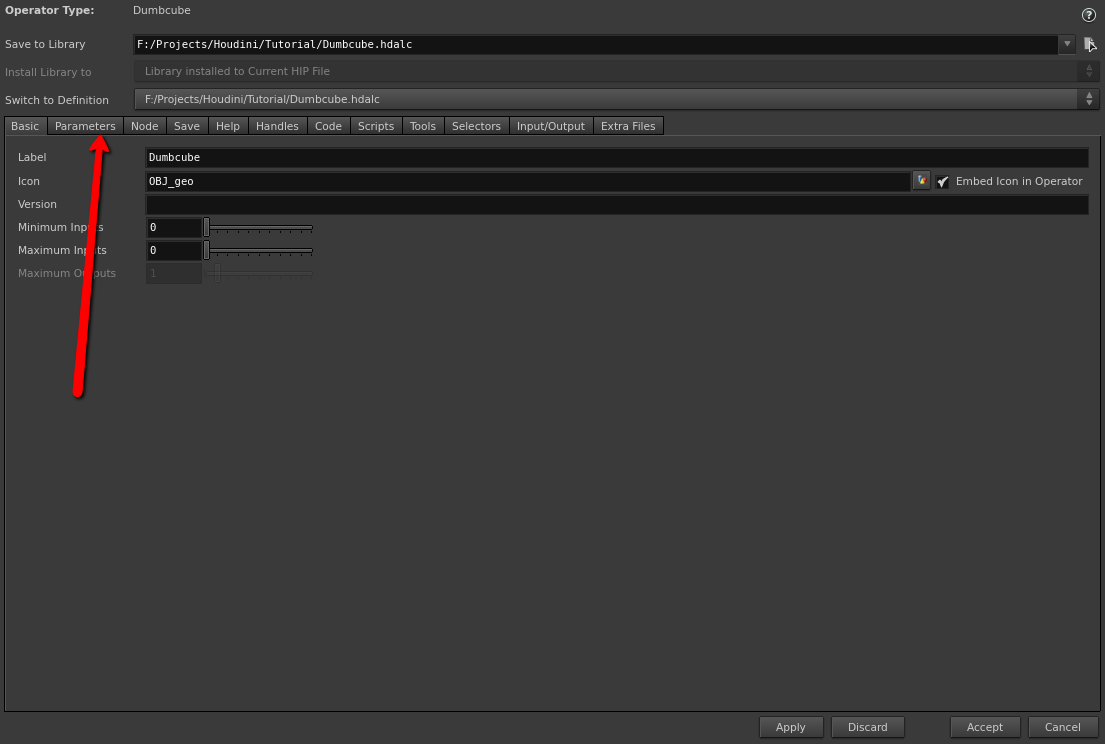
 By default it sticks a bunch of unnecessary parameters on your Digital Asset. To get rid of those click the parameters tab on the window that just opened.
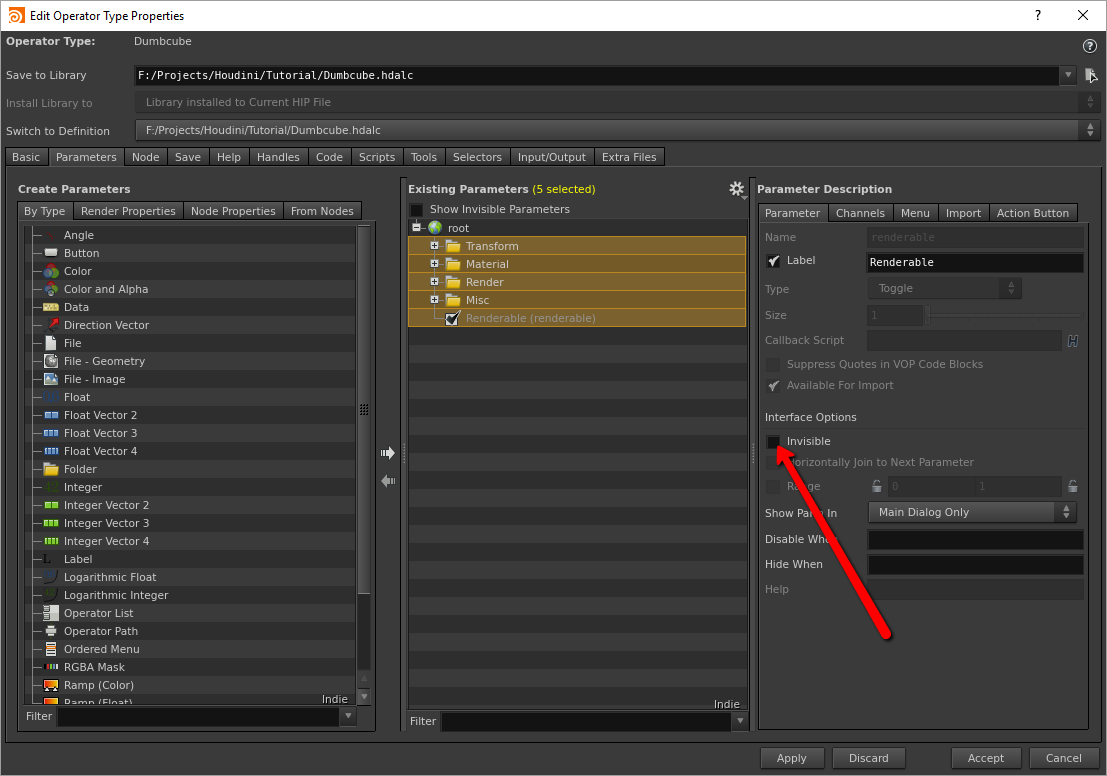
 Select all of the parameters below the root and set them to invisible and then click “Accept” at the bottom of the dialog.
 So cool, we’ve created a digital asset! It’s a cube that doesn’t do anything but hey it worked! You have to start some place. Let’s throw that sucker in-game. There’s a couple of ways to import a Houdini Digital Asset into Unreal but if you installed Houdini Engine correctly just drag and drop the HDALC file it created into the content explorer.
 Now dragging the asset from the content explorer to your view port will put your cube in-game.
 - Getting user input from Unreal – So we added a cube that we can’t do anything to. To change that we need to be able to take user input from inside of the Unreal Engine. In order to do that we need to give this cube parameters and in order to do that we need to reopen the parameters window. That can be found for each of the digital assets in your scene from the “Assets” menu at the top.
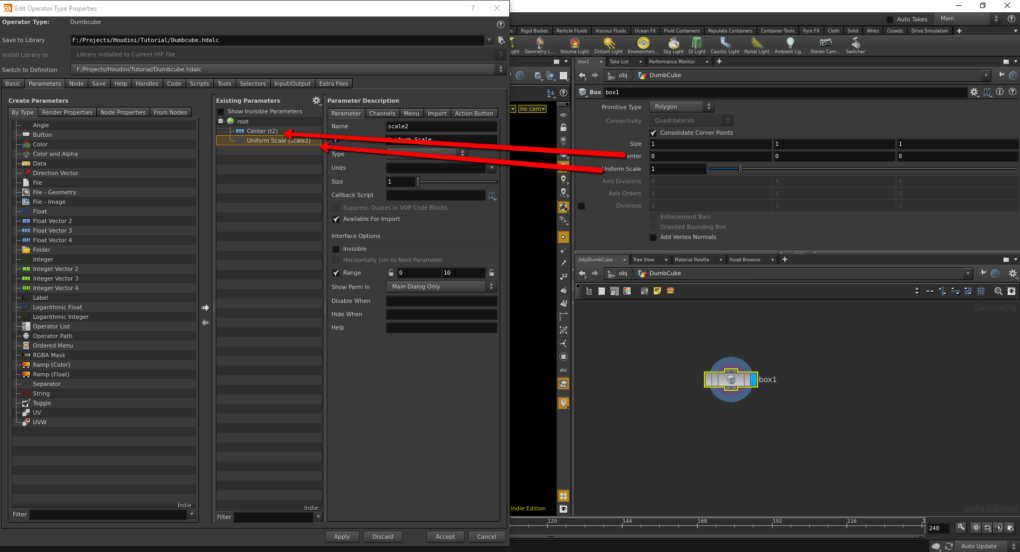
 One of the great things about adding parameters to a digital asset is that a lot of them can be added by just dragging and dropping the parameter’s label into the parameters list. So let’s do that by clicking on the labels for “Center” and “Uniform Size” and dragging them to the root element on the parameters list.
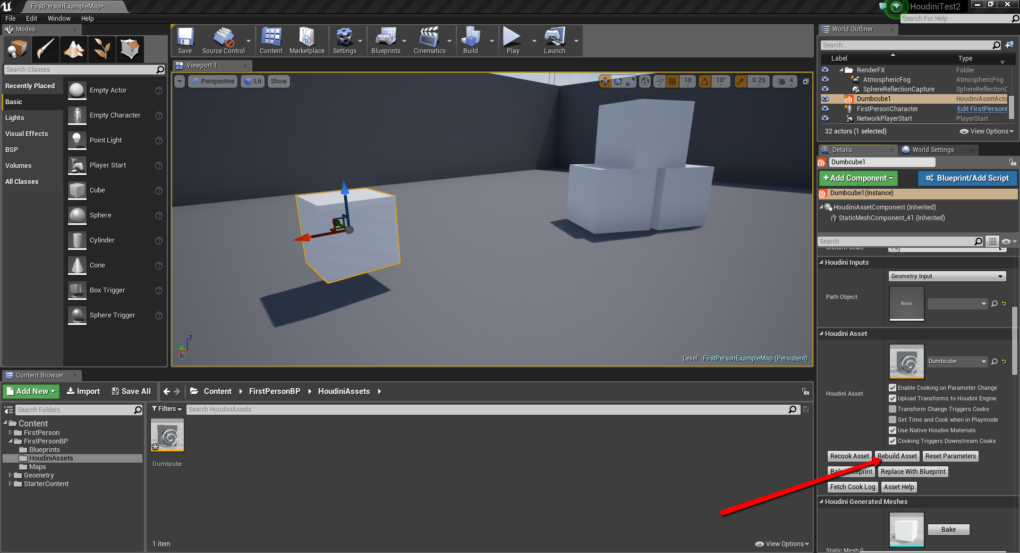
 Click apply and accept and then go back to your Unreal window. Don’t worry about re-importing the Houdini asset. Just find it in your scene and go to the “Houdini Asset” controls. You’ll find a button there called “Rebuild Asset”.
 Clicking that will have it pick up on the changes you just made to the Digital Asset, and voilà your new parameters should show up in engine for you to alter.
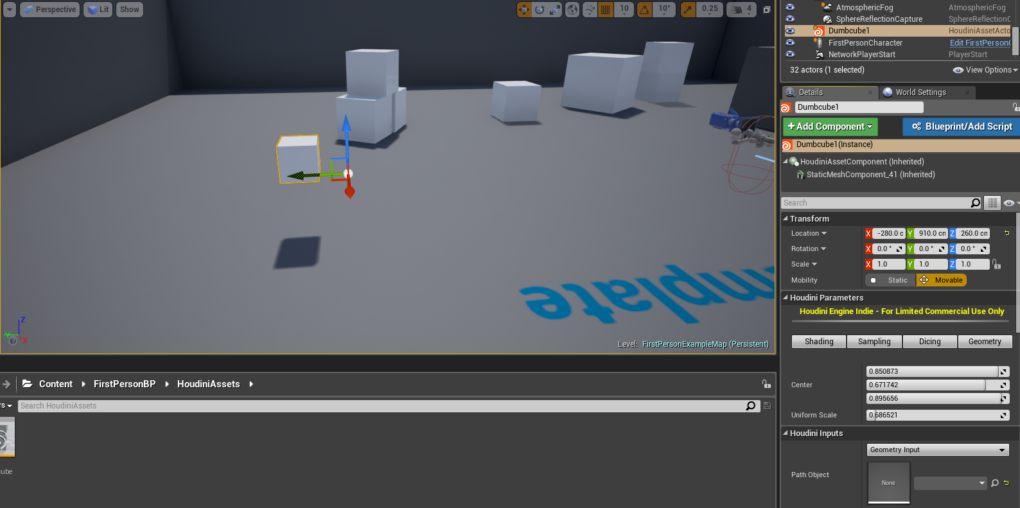
 So by manipulating those parameters we can instantly update the output of the Houdini Digital Asset. Unfortunately right now all that means is that we can scale it and throw it off its center axis.


I realize this post might not seem like much, and admittedly it won’t have you building awesome assets right out the gate, but as I said you have to start some place. Hopefully if there’s interest I’ll get in to a lot of the cooler topics like sweeping a curve, scattering points, using copy stamp, and setting up self-adjusting UV’s. Thanks for reading. Let me know what you guys think.
back to blog