Put Your Money Where Your Mouth Is
April 5th, 2016
A.K.A If It’s So Easy Then Why Don’t You Try It A$$#@!e !
So last week I wrote a post about why I don’t think that blueprints are the end of the world and I included a few tips on how to refactor them so that they are readable. The post was well received but a couple of people brought up the fact that my tips were good for writing clean code going forward and less useful for de-tangling already messy code. In retrospect I have to admit that they are right. The code examples I showed in last week’s post were written specifically for that post. What I needed was some really messy code to rip into. Something that looked like ear buds that you accidentally left in the pocket of your pants… and then washed the pants forgetting they were in there… and then tangled up the pants for some reason.. You know, like how most people assume blueprints are supposed to look. But where was I going to find that?
Enter my buddy Momin to the rescue. Momin Khan is a developer for Root 76 Games ( FB, Twitter ) and also a fellow member of the Richmond Game Jams group. Momin is a highly skilled developer, but Momin’s background is in Unity. He did however try Unreal once. For the last Ludum Dare challenge, in 48 hours, Momin wrote an entire game start to finish in Unreal Engine, a framework he had never worked with before. The game was called Sumo Twomo and was a cool little local two player game where players try to push each out of the ring. The important part about Sumo Twomo for the purposes of this article is that Momin entered it in the compo, meaning that he also had to release the source code! Which means that I now had access to a working source code written in blueprint, written by someone unfamiliar with blueprint that I could dissect on my website for literally dozens of people to see and there was nothing anyone could do about it!!! Mwaa Haaa Haa!!! Oh and also I asked Momin if he’d mind letting me dissect his code and do this post and he said it was cool. Come on guys, I’m not a dick.
So before I start lets look at what Sumo Twomo’s game description:
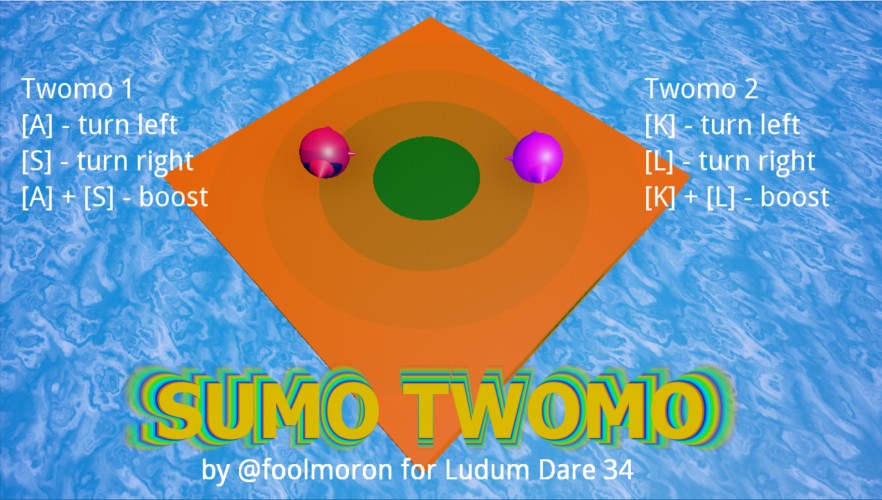
You play as a Twomo – an alien creature who is known to engage in rolling death matches from time to time. They can also grow in size by absorbing life energy from the universe. Eventually they will absorb all life, and the concept of existence as we know it will become meaningless.
This game was the result of me struggling with Unreal 4 for the entire weekend! It’s honestly a miracle I got something playable out…
Windows-only sorry
CONTROLS
Twomo 1
A – turn left
S – turn right
A + S – boost forwards in the direction you’re pointing
hold A + S – slowly grow in massTwomo 2
K – turn left
L – turn right
K + L – boost forwards in the direction you’re pointing
hold K + L – slowly grow in mass
Looking at the game the majority of the code seems to be in three main classes, the HUD, the Pawn, And the player Controller. So let’s start with…
Part 1: The Pawn
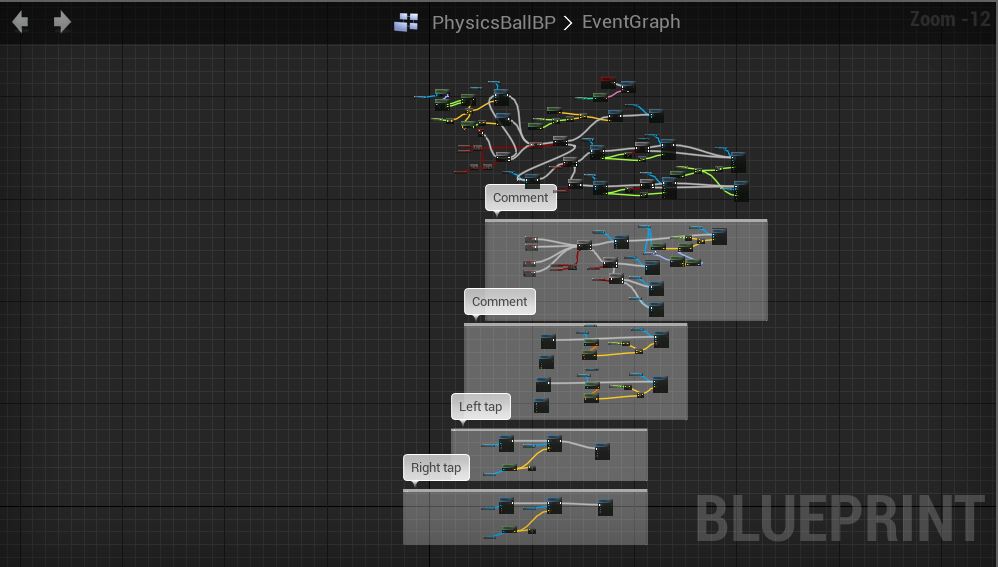
At first glance this blueprint looks way messier than it actually is. It’s typical practice to comment unused code instead of deleting it just in case you need it later. It looks like Momin has done that here by removing the input execution nodes. It looks like he was originally thinking about putting the control code on the pawn but decided against it. So the first thing to do is to prune away any unreachable code.
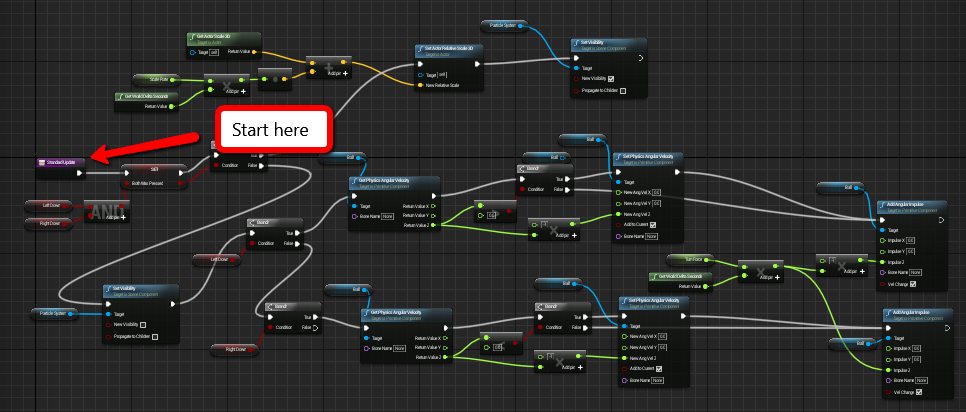
This leaves us a much simpler graph, but it’s still pretty messy. The next step in detangling this is to do exactly what you’d do with a ball of yarn. Find a loose end and start pulling from there.
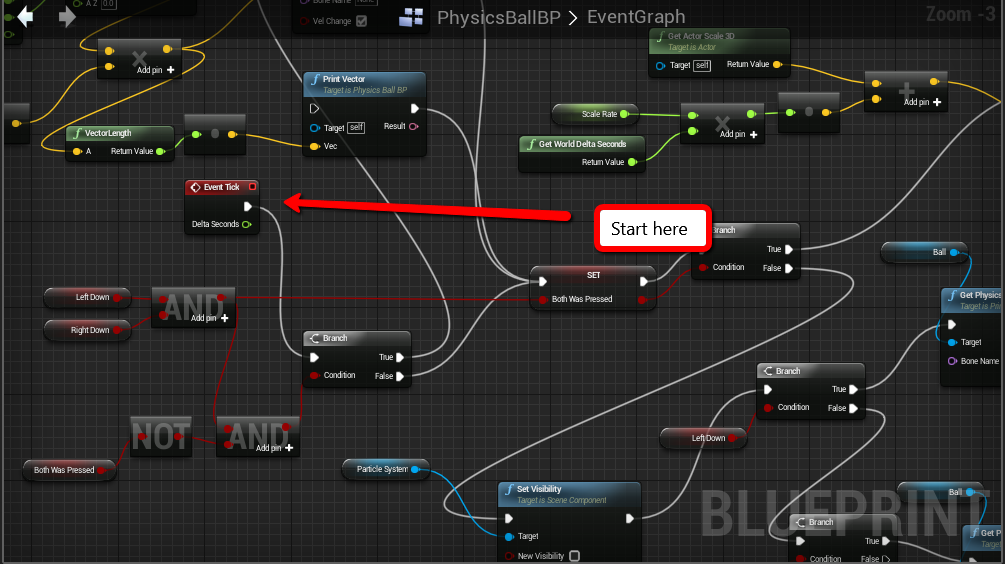
Starting with the event tick node I followed the path of execution until I found anything that looked like they should be refactored. It didn’t take too long before I found something.
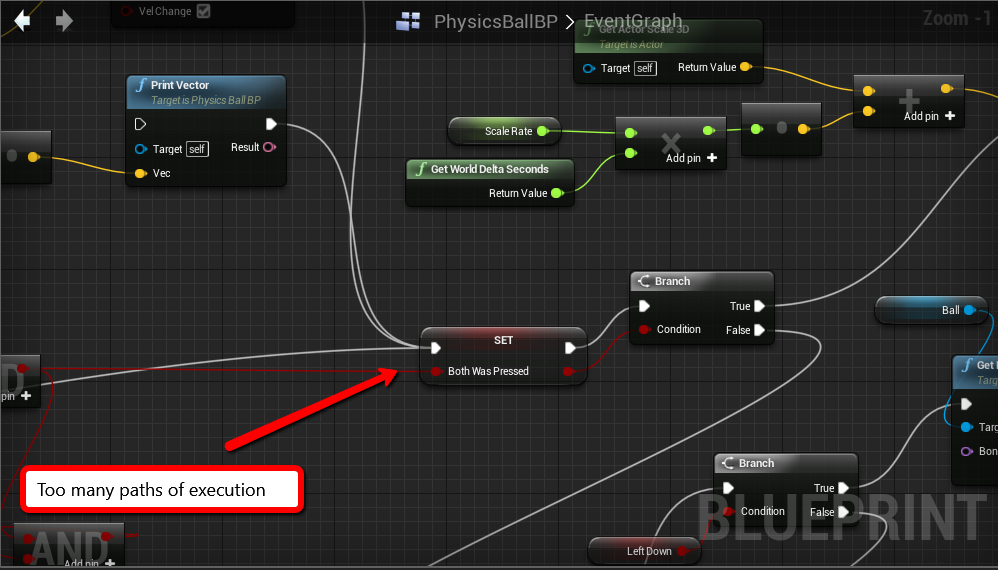
It’s common to want to merge paths of execution, especially if you already have a bunch of code written that you would like to just connect to. DO NOT DO THIS. This kind of like using a “Go To” in more conventional programming languages. It obfuscates what path of execution was used to get to a node and it makes your graph a mess. If you have two sections of code that both need to execute the same section of code. That shared section of code probably belongs in a function.
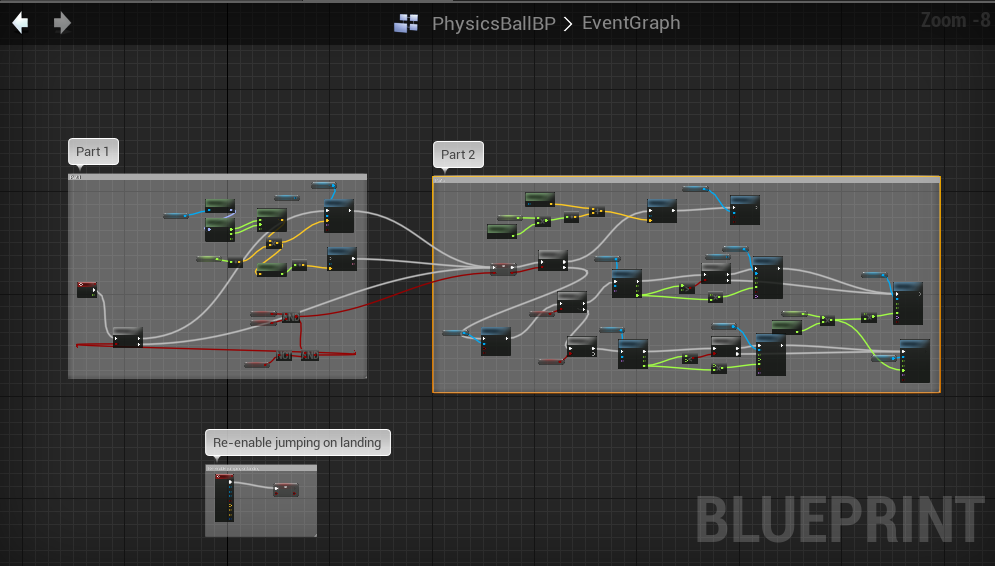
I noticed that this particular merge just about splits the code into two parts, so I moved the nodes and labeled the parts.
Note: There is a third execution path visible in the image below. That path was actually unreachable so it was dropped from all following images.
It is also common to want to reuse existing logical nodes as you’ll see below. This might speed up your execution time but not by enough that it will ever be noticeable, and the messiness it causes in your blueprint should be avoided.
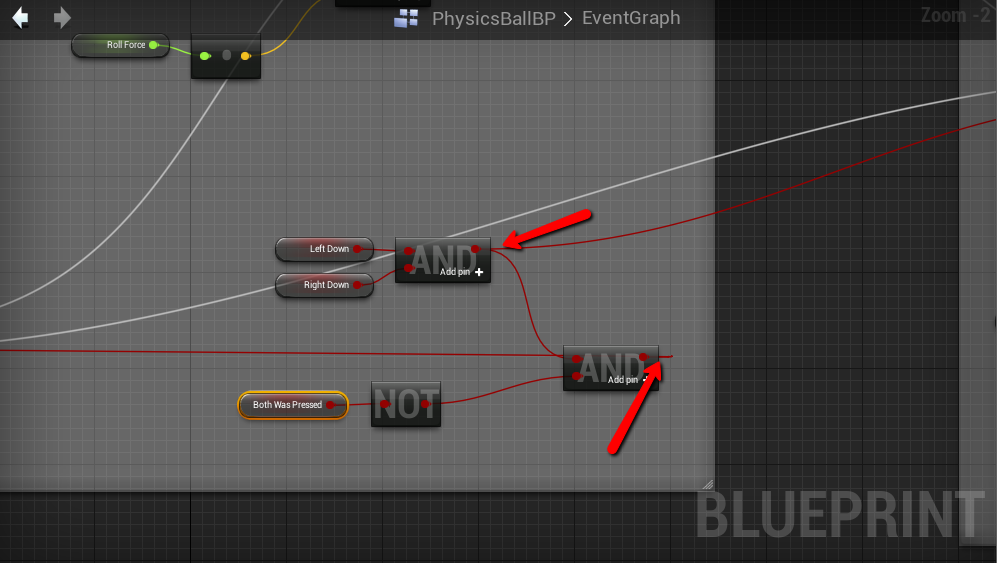
So I split the logical code into two and moved each section within their respective part.
Finally now that part 1 looked pretty clean, part 2 could be refactored as a function called “StandardUpdate”, leaving the whole pawn main blueprint to look as clean as the one below.

That last step is kinda cheating though. I can’t just shove all the messy parts into a function and call it clean, so let’s take a look at …
Part 1-B: The Pawn’s Standard Update Function
This function handles what the pawn does each frame based on input variables that were assigned in the player controller. It looks like Momin was toying with the idea of having the input on the pawn instead of the player controller. Just like in part one my first step is to start at the beginning of the execution path.
Next I took overly long sections of code and divided them using sequence nodes. I also commented the groups so it was a little easier to read.
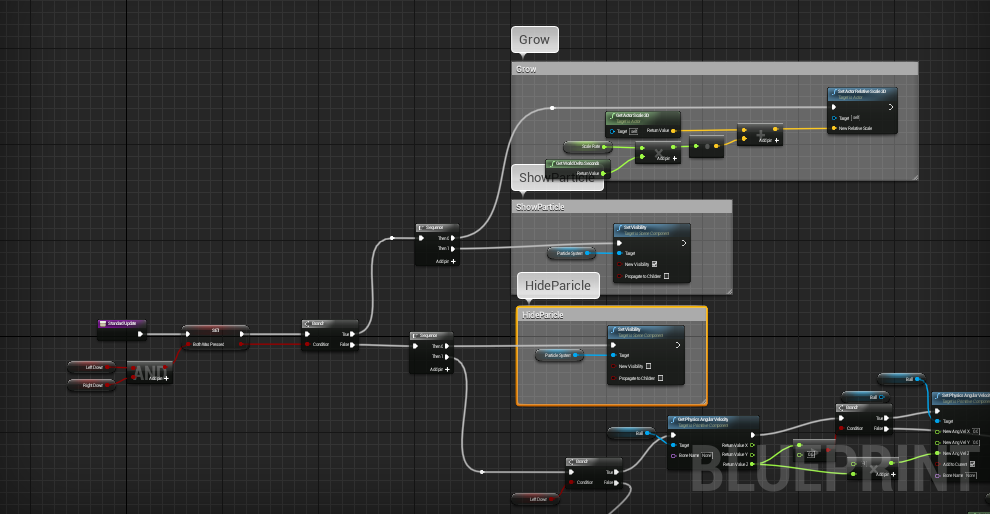
Then I did the same thing with the second half of the function. Notice that I’m also using the node align tools to straighten things out while I go.
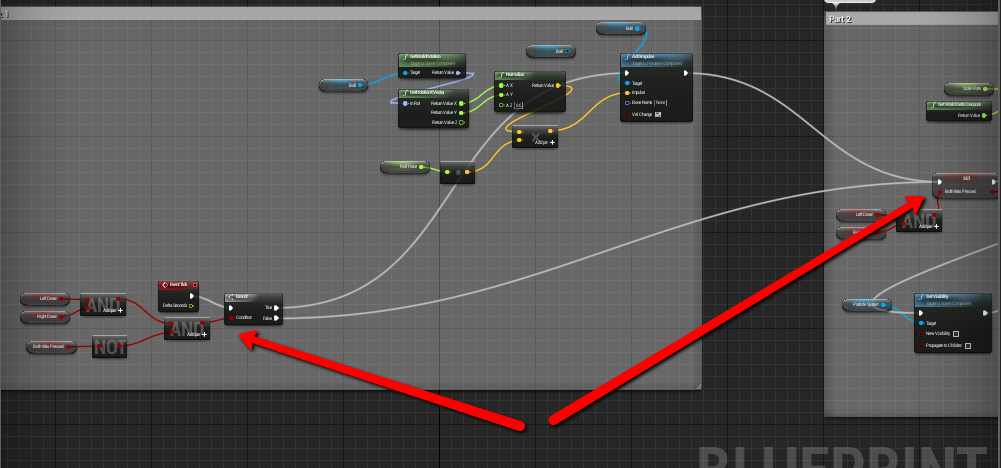
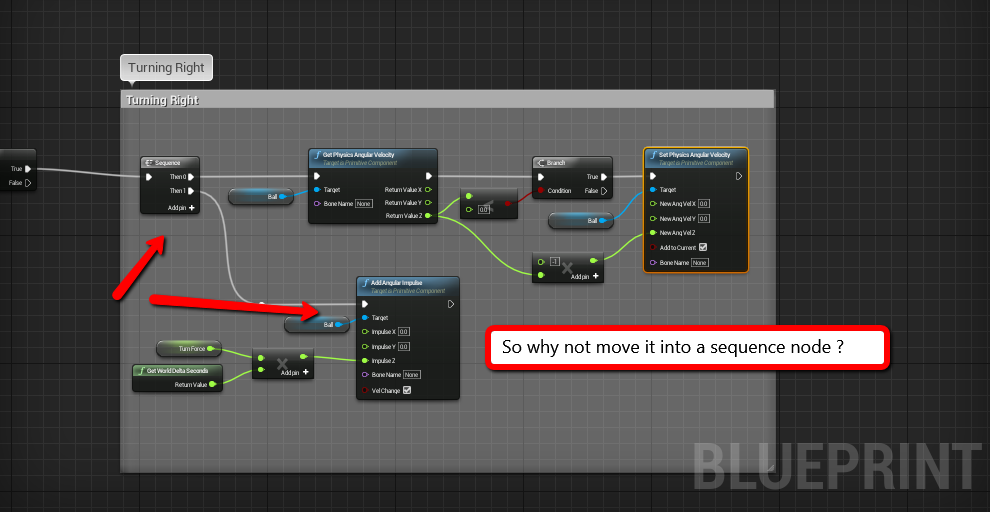
Next I found another case of merged path’s of execution. This one isn’t as bad as the earlier one, but it is still easily avoidable.
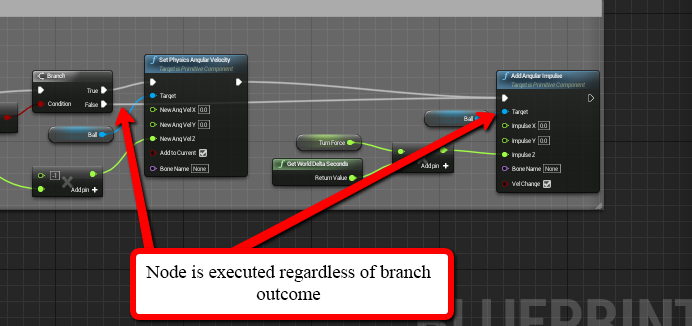
Because the last node in the graph will get executed regardless of which path the graph takes, it can easily just be moved to a second pin on a sequence node.
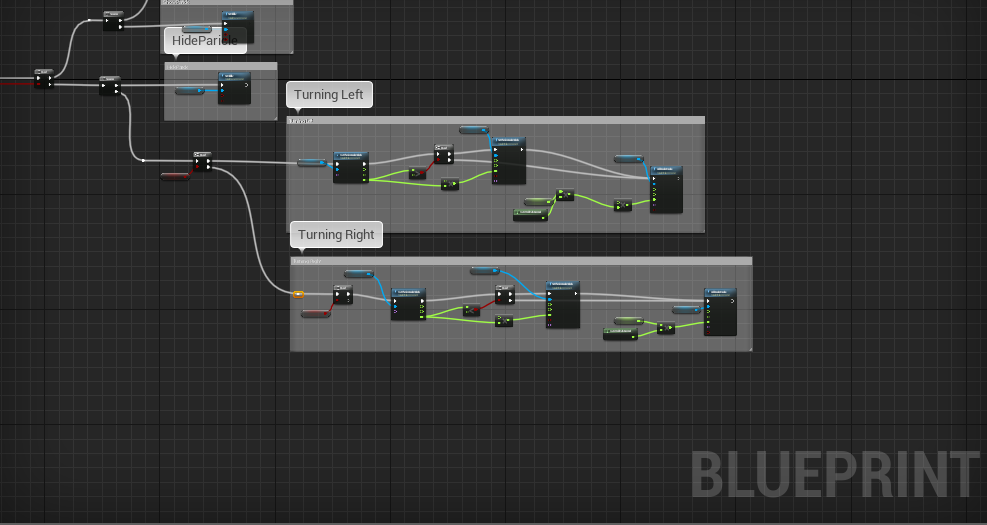
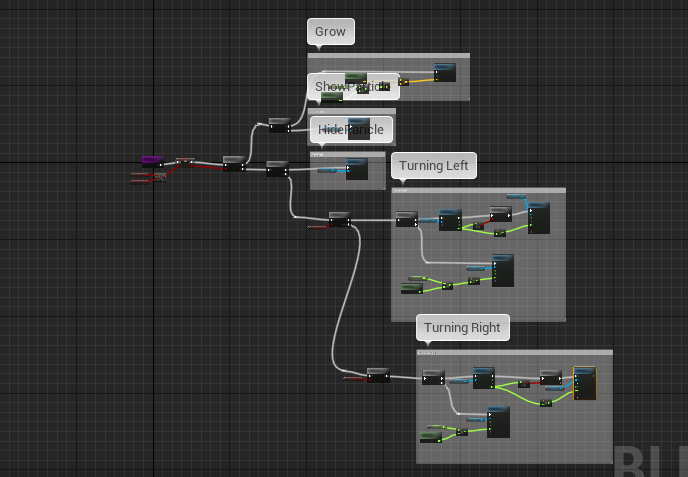
Finally the whole thing looks like this:
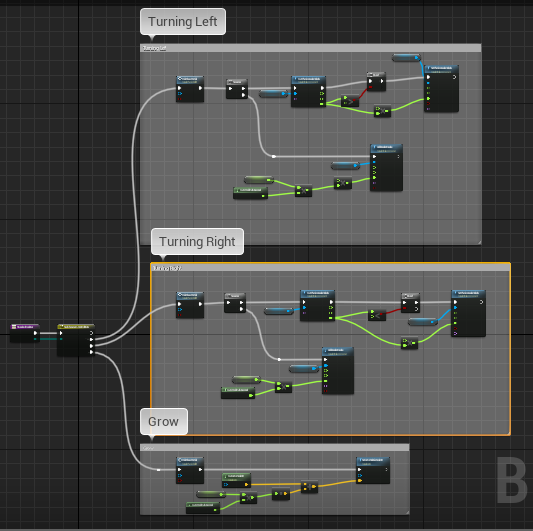
As clean as that is if I felt like reworking the code even more – I could make it even cleaner. There are a lot of branch nodes to determine what state they key press is in. You could clean up all this code by storing the state of the key press in an enum instead of in a series of boolean, and then just updating the state on key up/downs.
Note: The two images below are an example of how the code could look if it was based on an enum. I didn’t actually wire this part up.
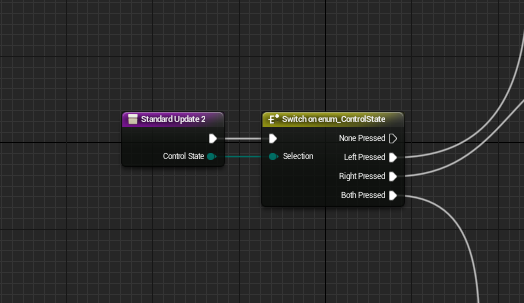
I think you’ll agree that that is a lot cleaner looking.
Part 2: The Player Controller
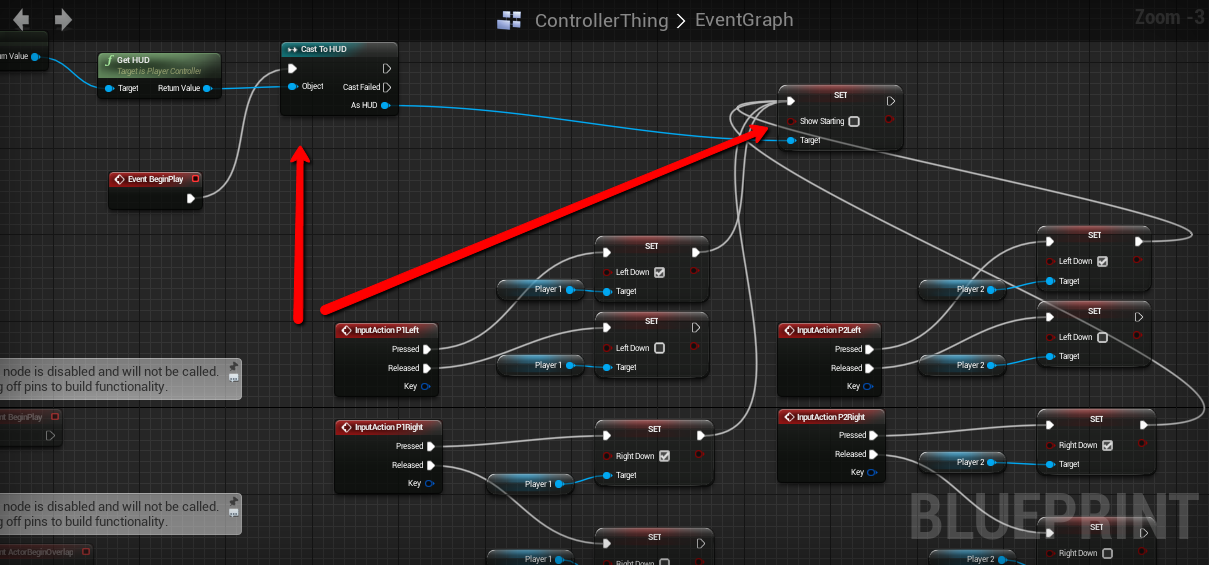
This one was much cleaner than the pawn blueprint but still had a few areas to clean up. The first thing I noticed was that thin blue line leading from the output of one path of execution to the input on a separate path of execution.
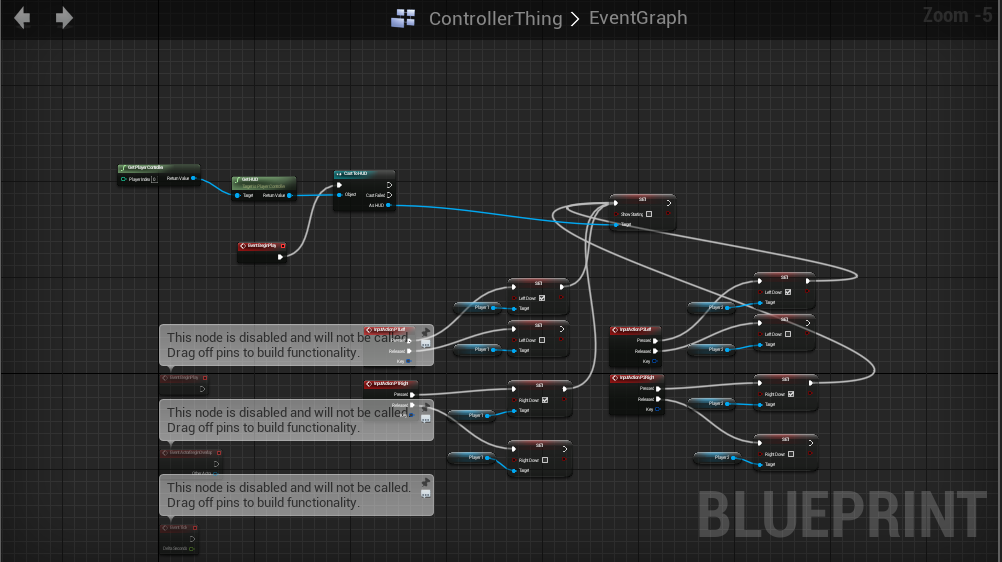
I was kind of surprised that even worked. I guess there’s some interesting caching of values going on under the hood. For future reference though, DO NOT DO THIS. There is no guarantee a node from a separate path of execution will have executed in order to give you the output you are looking for…. Well almost no guarantee. Momin stuck this on to the Event_BeginPlay path of execution so it would always be the first thing that got executed.
Still it’s much cleaner and a lot less dangerous to just promote that output pin to a variable you intend to call later.
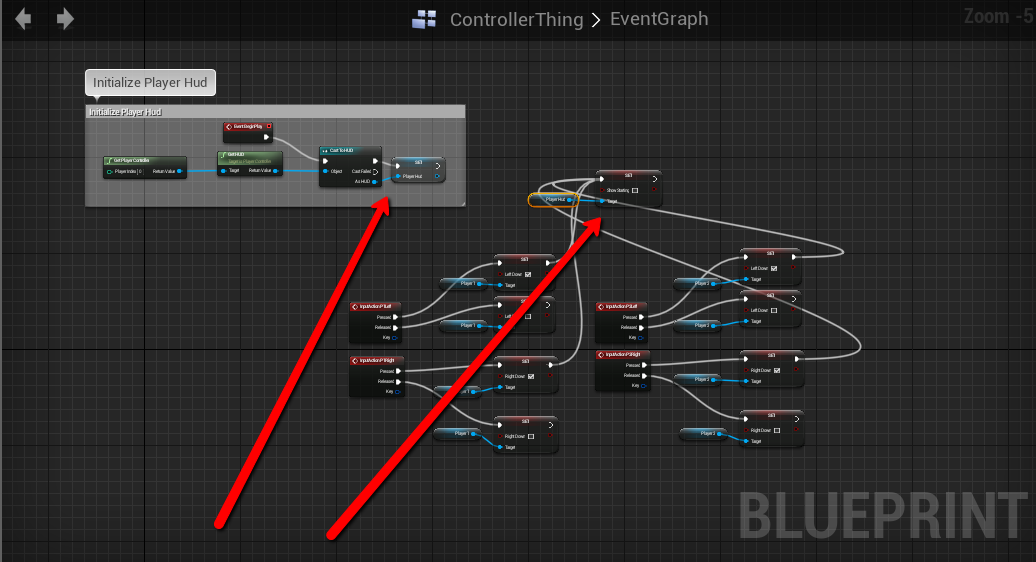
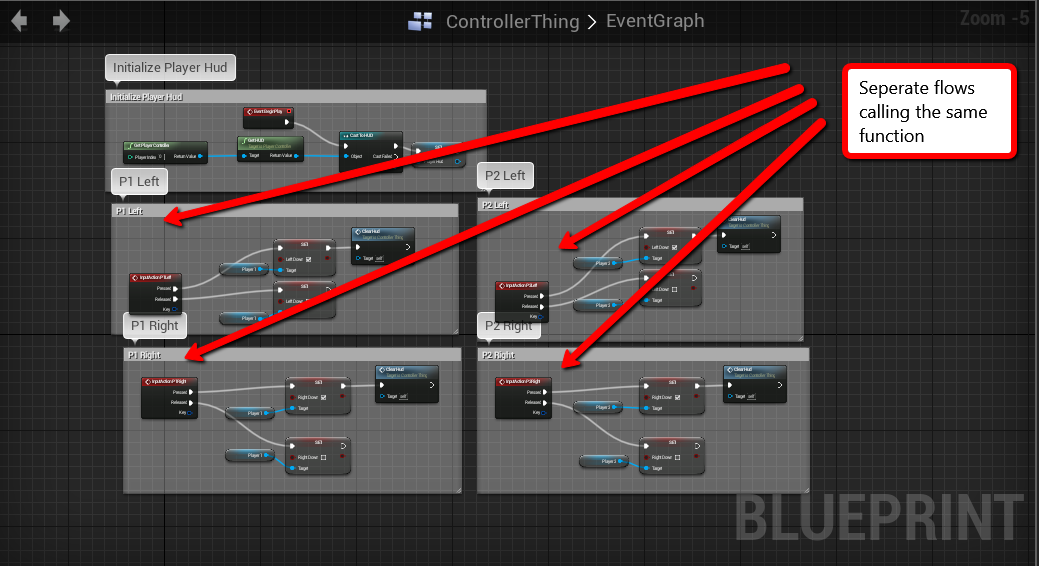
Now all I needed to do was separate all the merged flows of execution happening on the right side of the graph. Because they were all calling the same thing it was a no-brainer to break that out into a function.
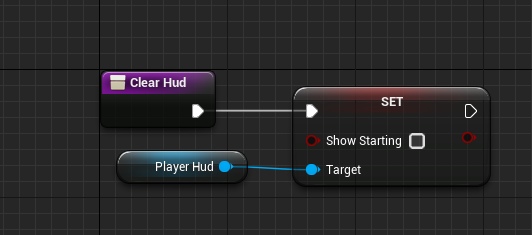
It was a small function, but hey look how nice it leaves the graph looking!
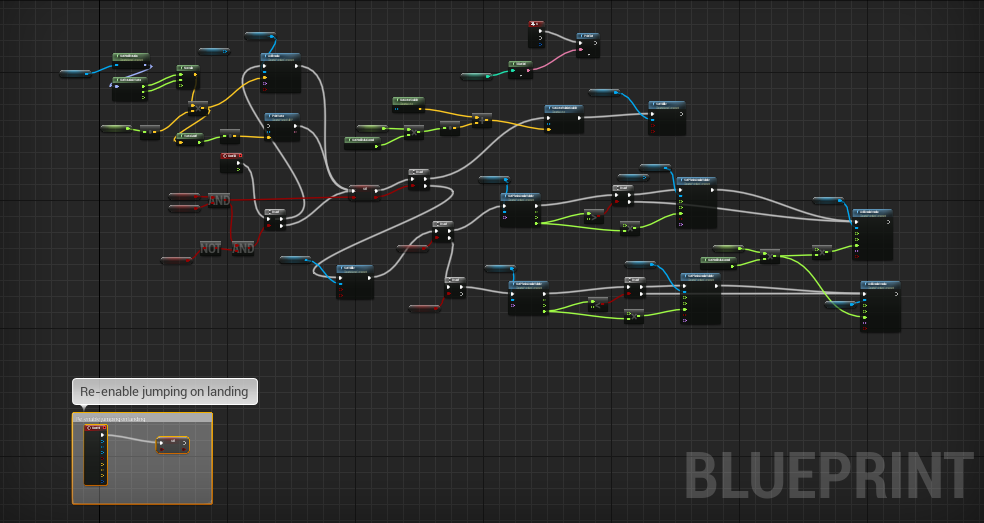
Part 3: The HUD
Momin had mentioned earlier that he had a lot of trouble doing math in Unreal Engine. I hadn’t yet hit any really math-heavy portions of code, but that all changed when I opened up the HUD class.
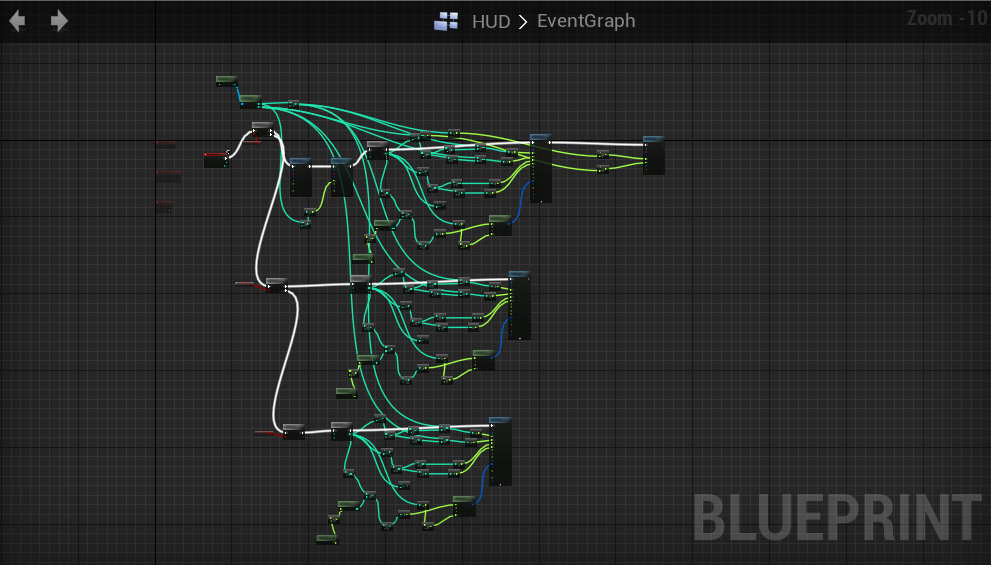
I suddenly understood all of Momin’s hate for Unreal Engine. He’s a better man than I. There is no way in the world I would have had the patience to deal with all of this. I can almost feel his rage through this code.
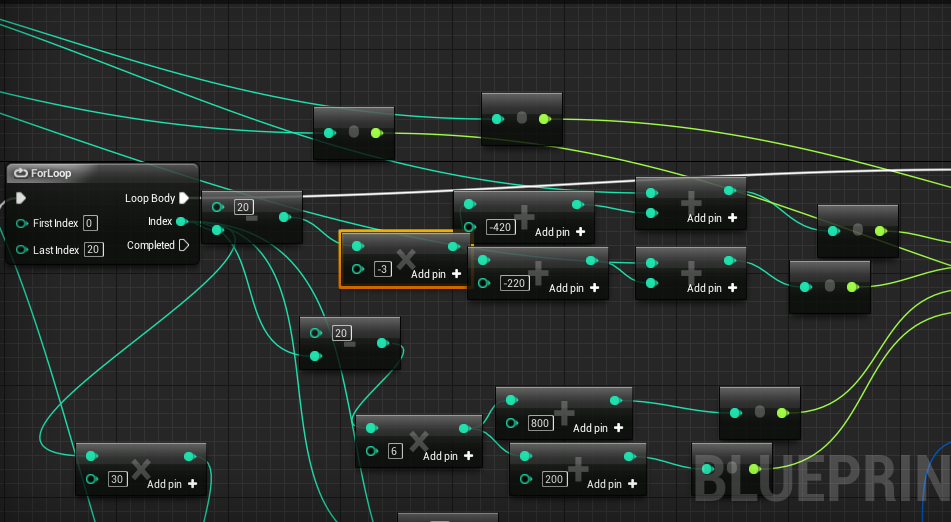
I started to try to untangle this monster, but this one was too much for me, and honestly refactoring this class to look neat wouldn’t make a good post and wouldn’t really accomplish much. What Momin was trying to do was to put a menu on-screen between games, and the score up during, both of which are easily done with UMG Widgets but that’s for a different post.
I’m not going to refactor this blueprint, but I will show you how to do complicated mathematical operations in blueprints. What you need to do is to make use of the Math Expression Node.
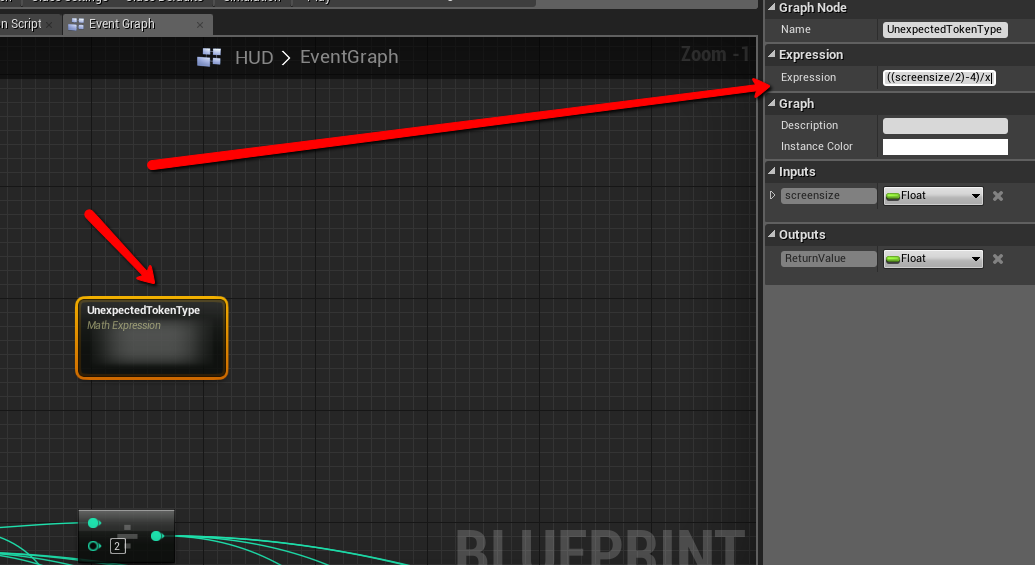
The math expression node allows you to type out any mathematical formula into it’s expression field.
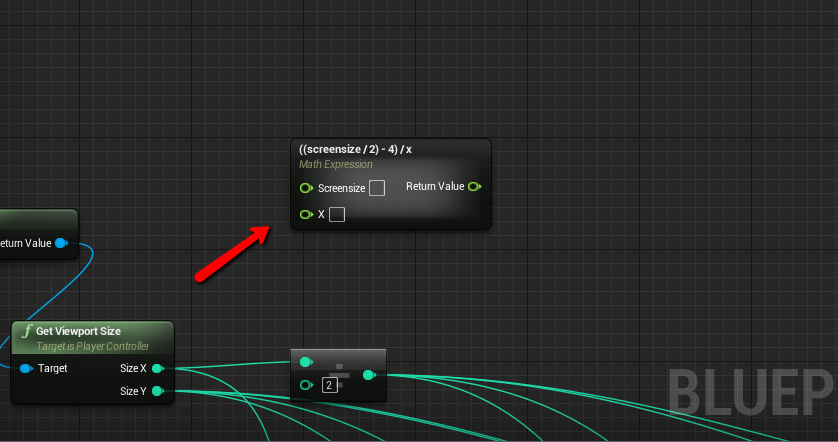
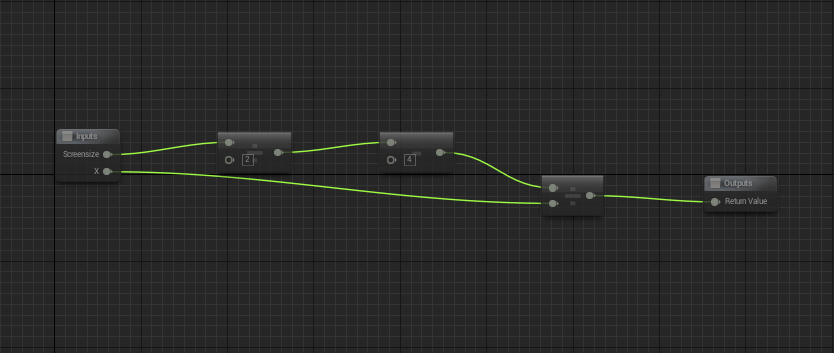
Once you hit enter, it parses your test looking for any variable names and turns your expression into a self-contained function. This is really useful for complicated math expressions. If you like, it even generates its own read-only visual representation of that expression.
So yeah, it’s easier to write about how to refactor code than it is to actually do it, but it’s still not too hard to do it. This whole exercise took me about an hour and a half and that’s including the time it took to take a screen shot every five minutes. If you are playing with the idea of refactoring your code just pick small sections at a time and try not to get frustrated. Your future self will thank you later when you inevitably need to come back and change something.
Also big thanks to Momin for letting me tear apart his code! I apologize for any areas where I may have been too harsh. Keep in mind this was the first thing he’d ever written in Unreal and he did it as part of a Game Jam. If you are interested in seeing what he can do, you should check out Clash Cup Turbo – it’s his awesome local multiplayer game coming soon on Steam for PC and Mac.
back to blog