Let’s Play with a lot of Meshes – Part 1
August 7th, 2017
Hierarchical Instanced Static Meshes in Unreal
So let’s say you want a ton of meshes on screen. Let’s pretend this is a forest or a bunch of asteroids or a series of columns along a path. The problem is that a lot of meshes means that it’s going to take longer for each frame of your game to render and thus your overall frames per second is going to drop. How do you fix something like this? Well if you have a problem like the ones listed above there’s a pretty cool solution.
Hierarchical Instanced Static Meshes
So with the problems mentioned above we need a lot of meshes, but the meshes we need aren’t all that different from each other. This is where hierarchical instanced static meshes become really helpful. Normally when your computer attempts to render a mesh it needs a set of information, such as the transform(size, location, and rotation), the materials, and the mesh information. Using an instanced mesh allows each instance of a mesh to use it’s own transform, but to share it’s materials and mesh information with all of it’s siblings. So let’s play around with it and see what it’s capable of.
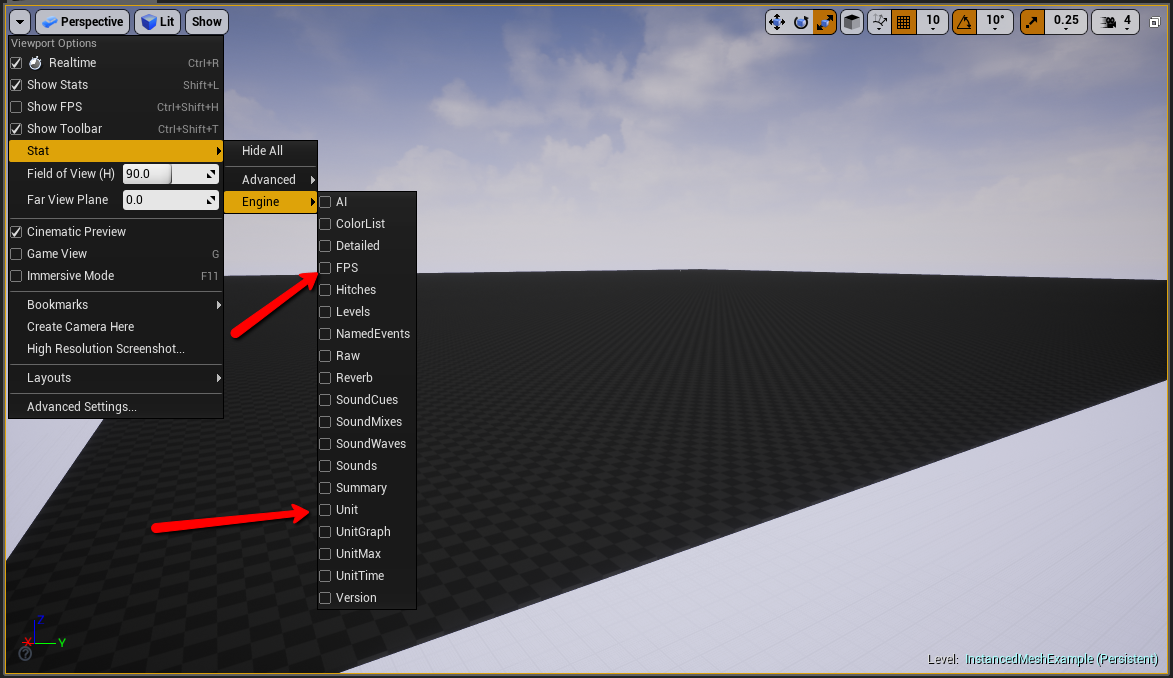
Real quick before I get into this I want to show you the tools I’m using to measure performance. At the top right of the screen there’s a drop-down that will allow you to turn on stats for your game. The one we are most interested in is the length of time it takes a frame to render. you can find that under the “Unit” option. I’ll also turn on FPS, because while it’s not the best metric for judging performance, it is the one that the most people are familiar with.
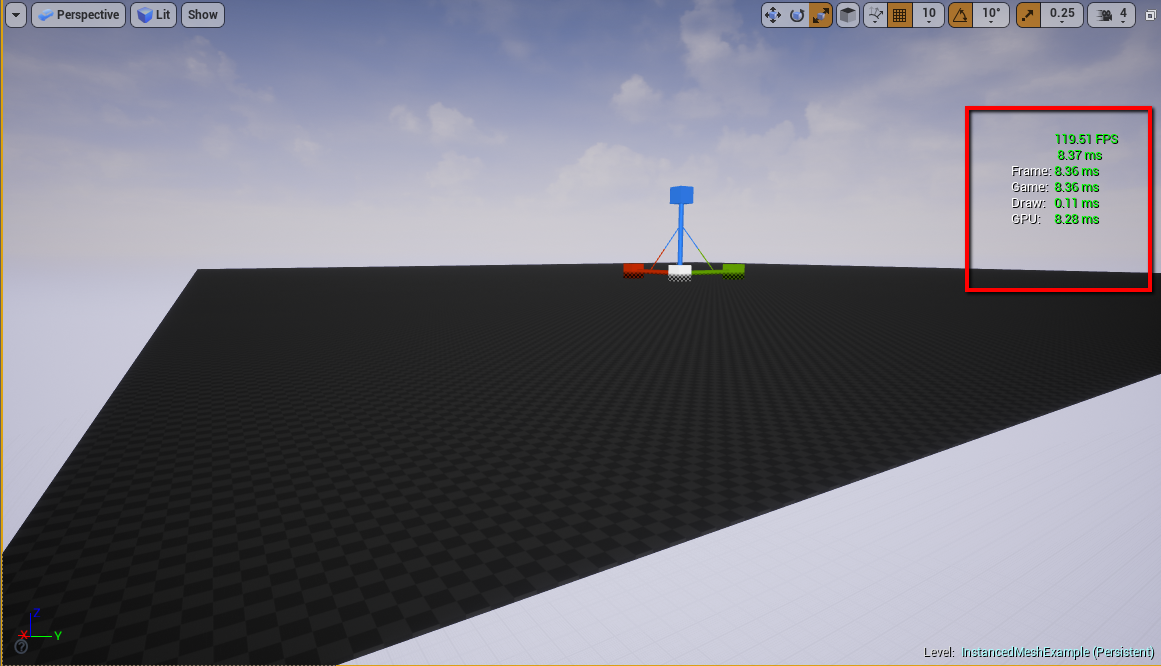
And here’s what it looks like once that’s been turned on:
Let’s add some meshes. I’m going to create a really simple mesh placing blueprint. It will take in a number of columns, a number of rows, and a set distance between each mesh and spit out a grid of meshes. I’m going to do it wrong first just to see how bad the performance is.
Here is the BP I’m using:

This is all coming off of the construct Node.
So let’s put this in the world and see what happens. I need to give it a relatively complex mesh for this experiment. The Unreal material showcase mesh should do fine.
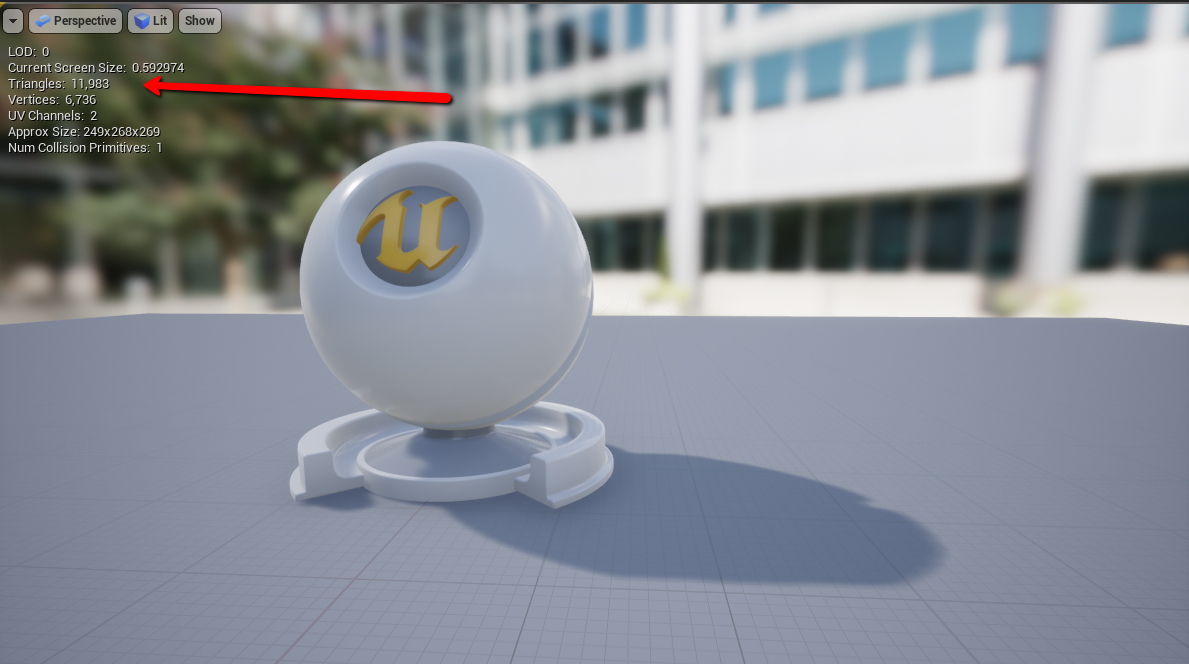
It takes 2 separate materials and just under 12,000 triangles. Let’s load it in the mesh placer and see what happens.
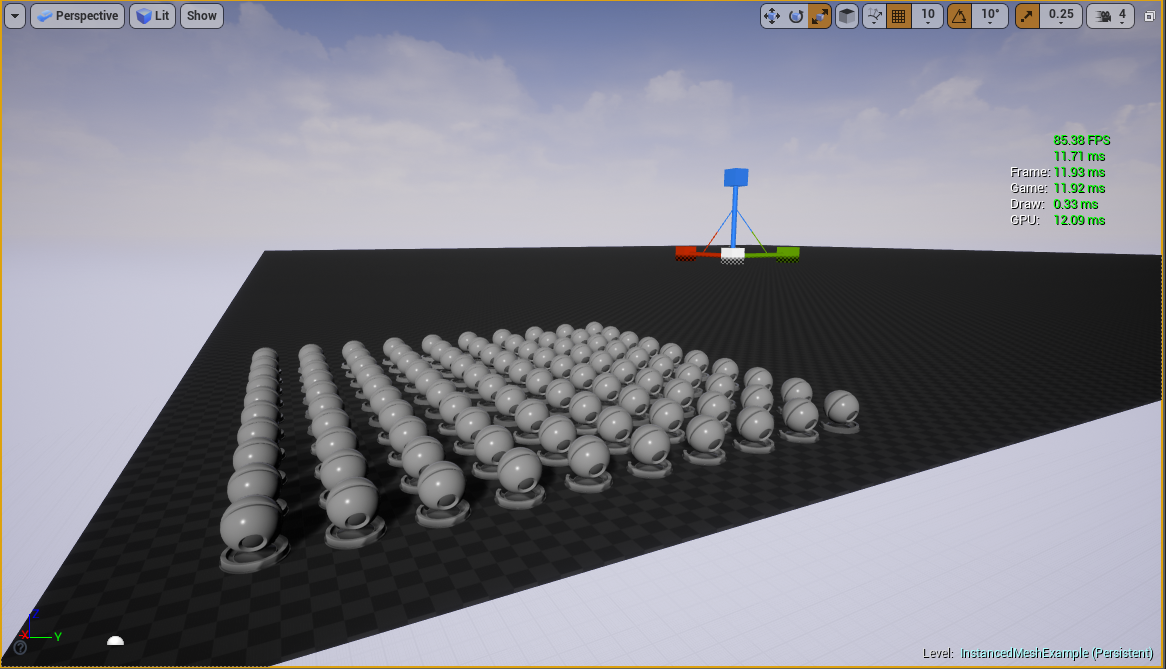
For a simple 10 by 10 grid performance isn’t too bad. Our frame rate has gone from 119 to 86 though and the cost of each frame jumped from 8.36ms to 11.93ms. But that’s only for a 10×10. That’s only 100 meshes. 1,200,000 approximate triangles. Let’s go higher.
Here’s the same grid at 40×40: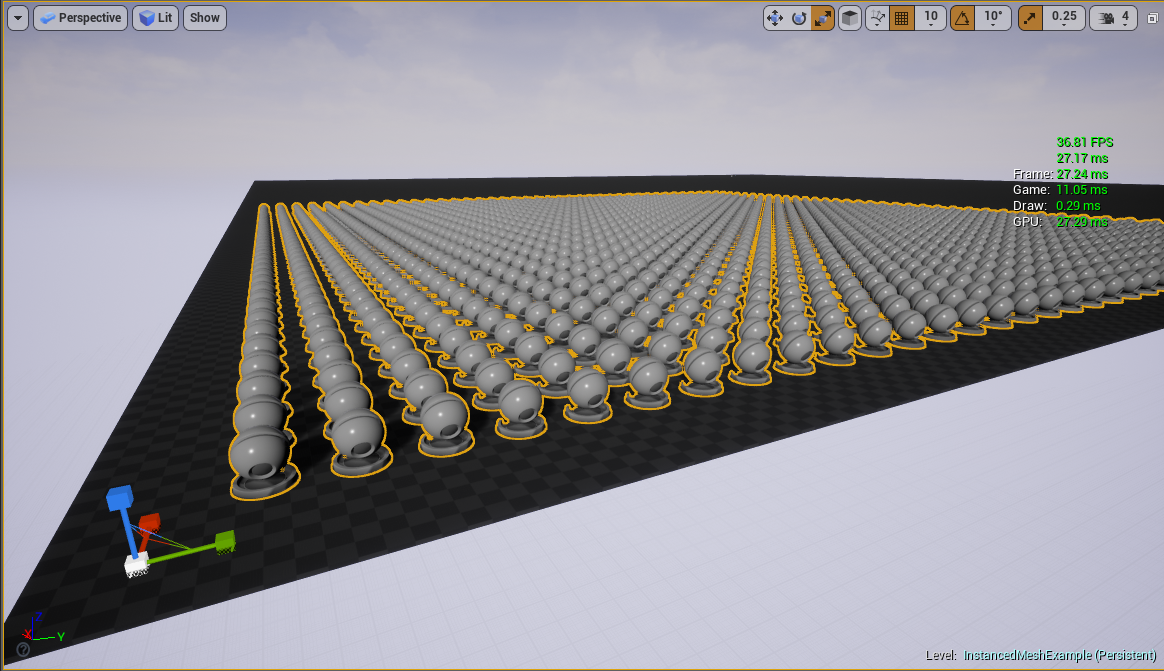
You’ll notice quite the frame drop here for 1,600 meshes and 19,200,000 approximate triangles.
Now here’s the same grid at 100×100:

…Yeah so turns out if you try to do this with a 100×100 grid the 10,000 meshes and approximate 120,000,000 triangles quickly crash your computer.
So let’s stop doing things the wrong way and instead use Hierarchical Instanced Static Meshes. I’m gong to take the same blueprint I used before for the grid, but now instead of adding a static mesh component every loop, I’m going to add an instance to a single H.I.S.M. The blueprint for this looks something like this: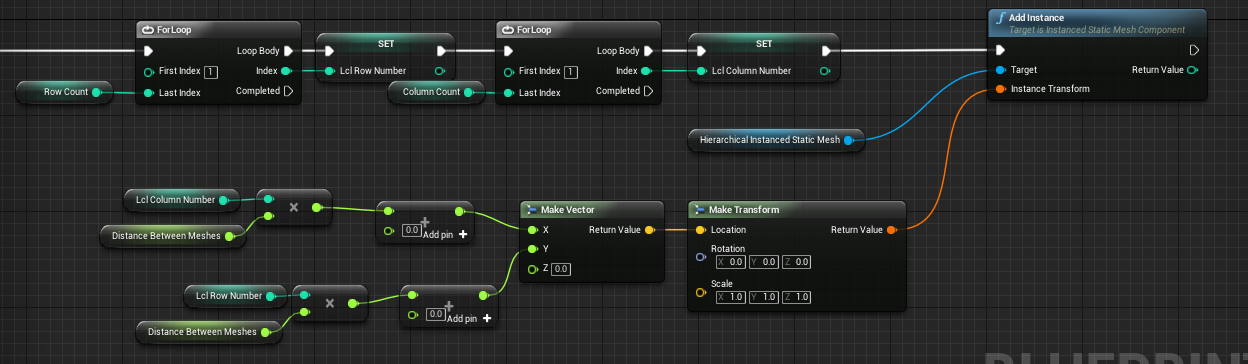
Now let’s try that 100×100 grid again.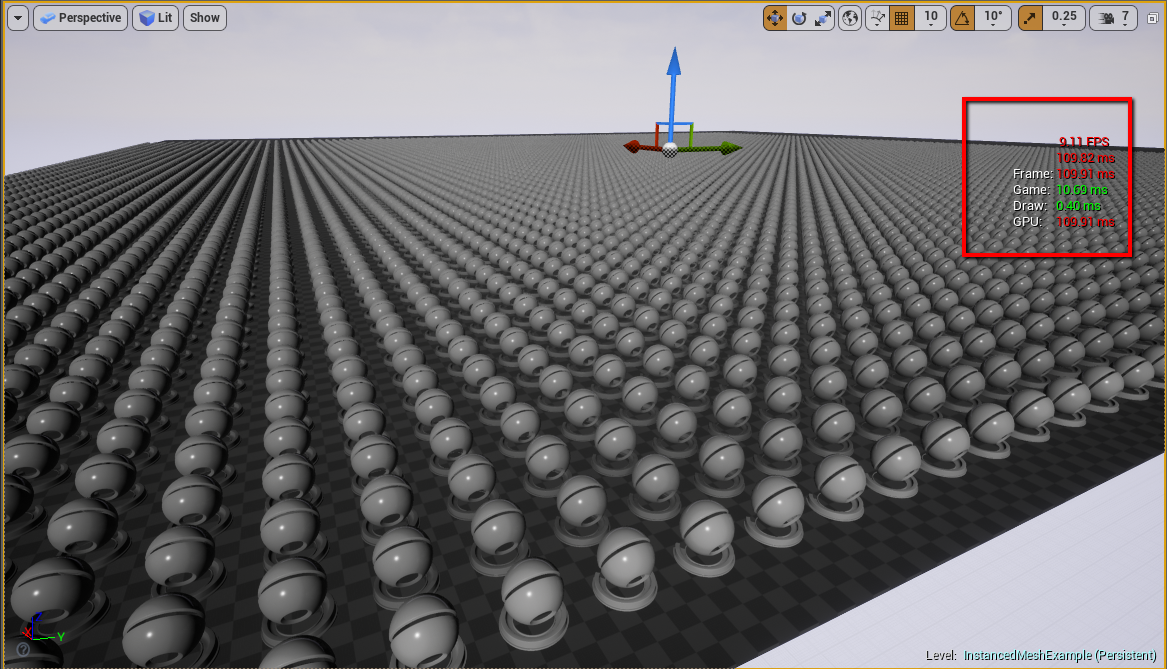
…And blamo. There we go. There’s our 10,000 meshes and approximate 120,000,000 triangles in all of their glory. Unfortunately the trade-off is that while we can now render it, we can only render it like 9 times every second. Which is likely to get noticed by the player ha ha.
Is there nothing else we can do to improve performance at all? Of course there is. Stay tuned for part 2 of this tutorial where I go into LOD’s and other performance improvements.
back to blog