Let’s Play with a lot of Meshes – Part 2
August 9th, 2017
Unreal Engine’s Automatic LOD System
So when I last left you we had created blueprint that, on its construction script created 1,000 instances of a mesh. We had taken our frames per second from less than one, up to nearly 10. But for our needs even 10 frames per second might not be enough /s. So how do we increase the FPS without losing visual integrity?
The answer is “Levels of Detail”, or LODs for short. LODs allow you to use multiple meshes to represent a single mesh depending on how far away the camera is from the mesh at any given point. So you could use a very detailed version of a mesh right next to the camera and very paired down version of that same mesh far away because the player is too far away to see the details anyway, and the player would never know.
This isn’t a new trick, games have been doing it for years, but Unreal as of version 4.14, makes the workflow so much easier. It used to be that you’d need to create your initial detailed mesh in a modeling program, then either manually remove details, or use a third-party decimation tool to create a simpler model from that. You’d then need to import all versions of that model into you engine and set up at what distance to use each. Unreal engine now allows you to just import your most detailed mesh and automatically make simpler versions of that same mesh to use for LODs.
So taking the Unreal material mesh we used in part one, let’s look at the LOD’s. By default, this mesh doesn’t have any. We can quickly add some though by going to the meshes details and under “LOD Settings” changing the number of LOD’s. I’d also uncheck auto compute LOD distance, just because I personally like being able to specify when yo use each version.
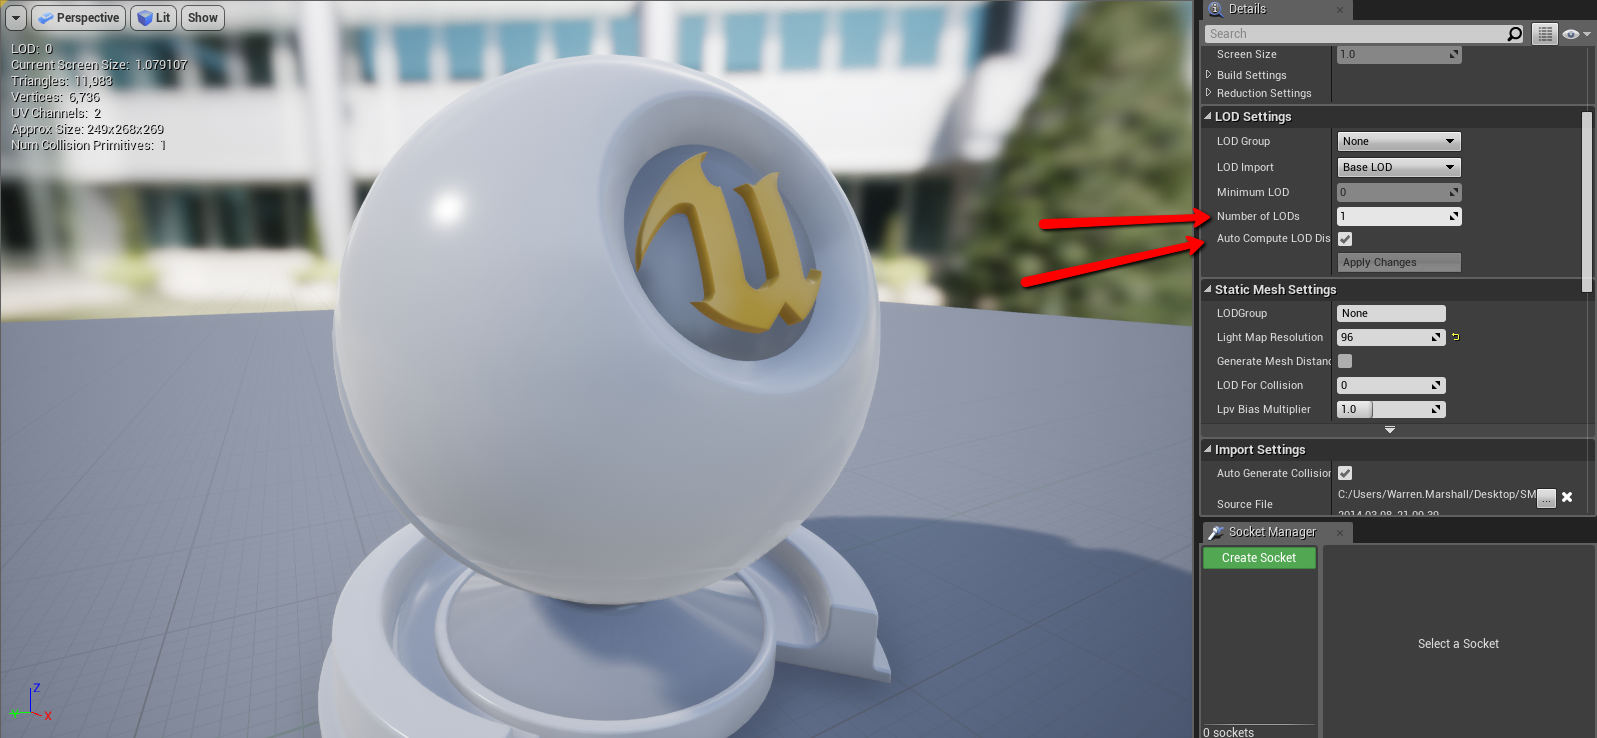
Now you’ll see a group of settings pop up on the right for each of the Mesh’s LODs. There is a lot you can play with there but the two really important parameters are the percentage of triangles and the screen size.
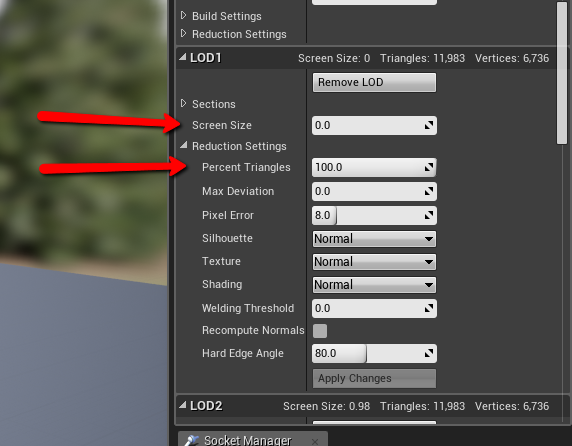
When you click apply changes at the bottom of the group an algorithm will make a copy of your original mesh and then attempt to remove vertices and edges on that mesh that it thinks are the least important to the structure of the mesh. Your percent triangles parameter determines how many triangles the final LOD mesh will have as some percentage of the original mesh. So you can specify that you want this LOD to only have half as many, or just a third of as many.
The screen size parameter, which by the way only shows up if you turn off automatic distances, sets the maximum size (or nearest distance) to use this particular LOD. You can actually get a rough estimate of screen size by zooming in and out on your mesh in the window and paying close attention to its current screen size stat.

Once you hit Apply changes you might not notice an immediate change, but a LOD will have been constructed. You can use the drop down list on the upper right hand side to switch LODs manually. Note that it sometimes helps to turn on the wire frame so you can see the exact changes in the mesh.
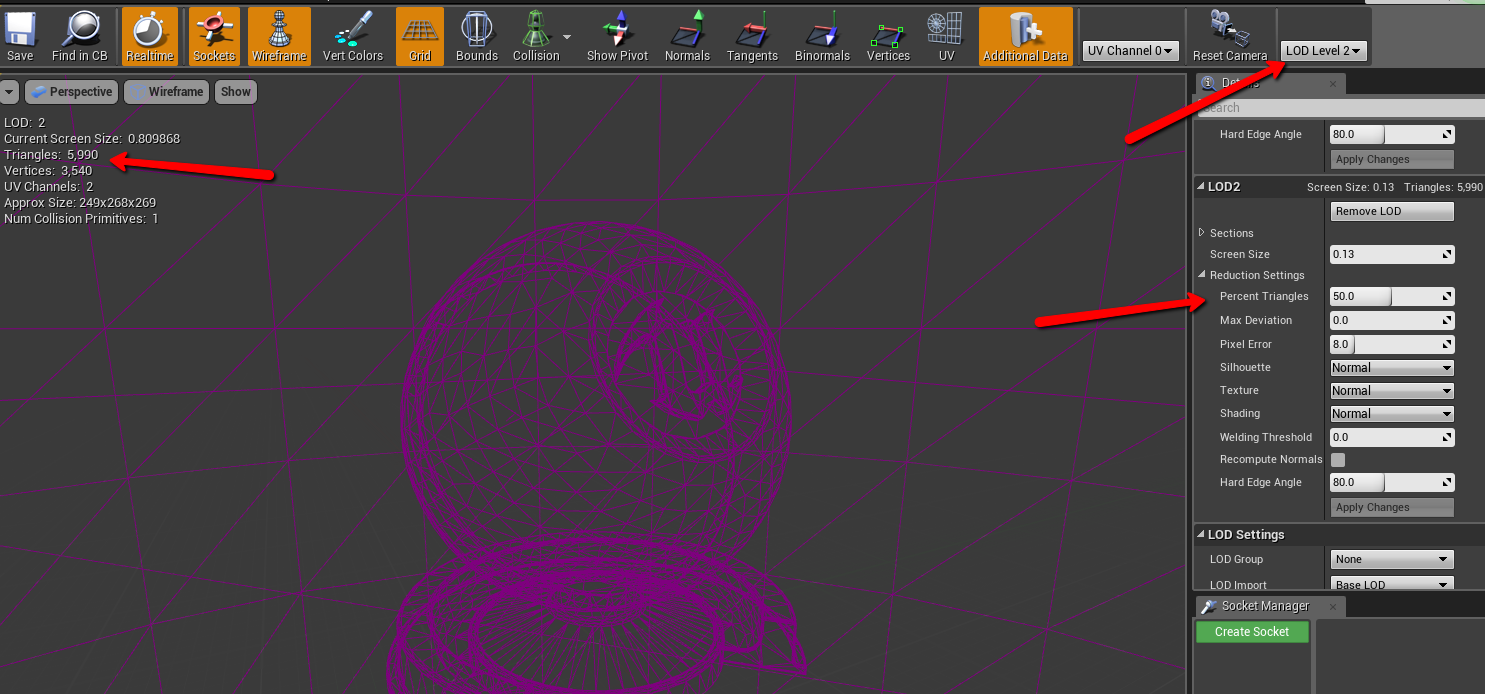
Also note that as you decimate your meshes and play with your LODs that the triangle count in the upper left will reflect the triangle count of the currently active LOD. Here you can see we’ve gotten the 12,000 triangle mesh down to just 6,000 triangles with very little visual change to the actual model.
It’s good to set up at least a couple of LODs of varying quality so that the transition is smooth as the player nears it. My very last mesh I’m going to have a really strong decimation effect in order to keep the poly count low.
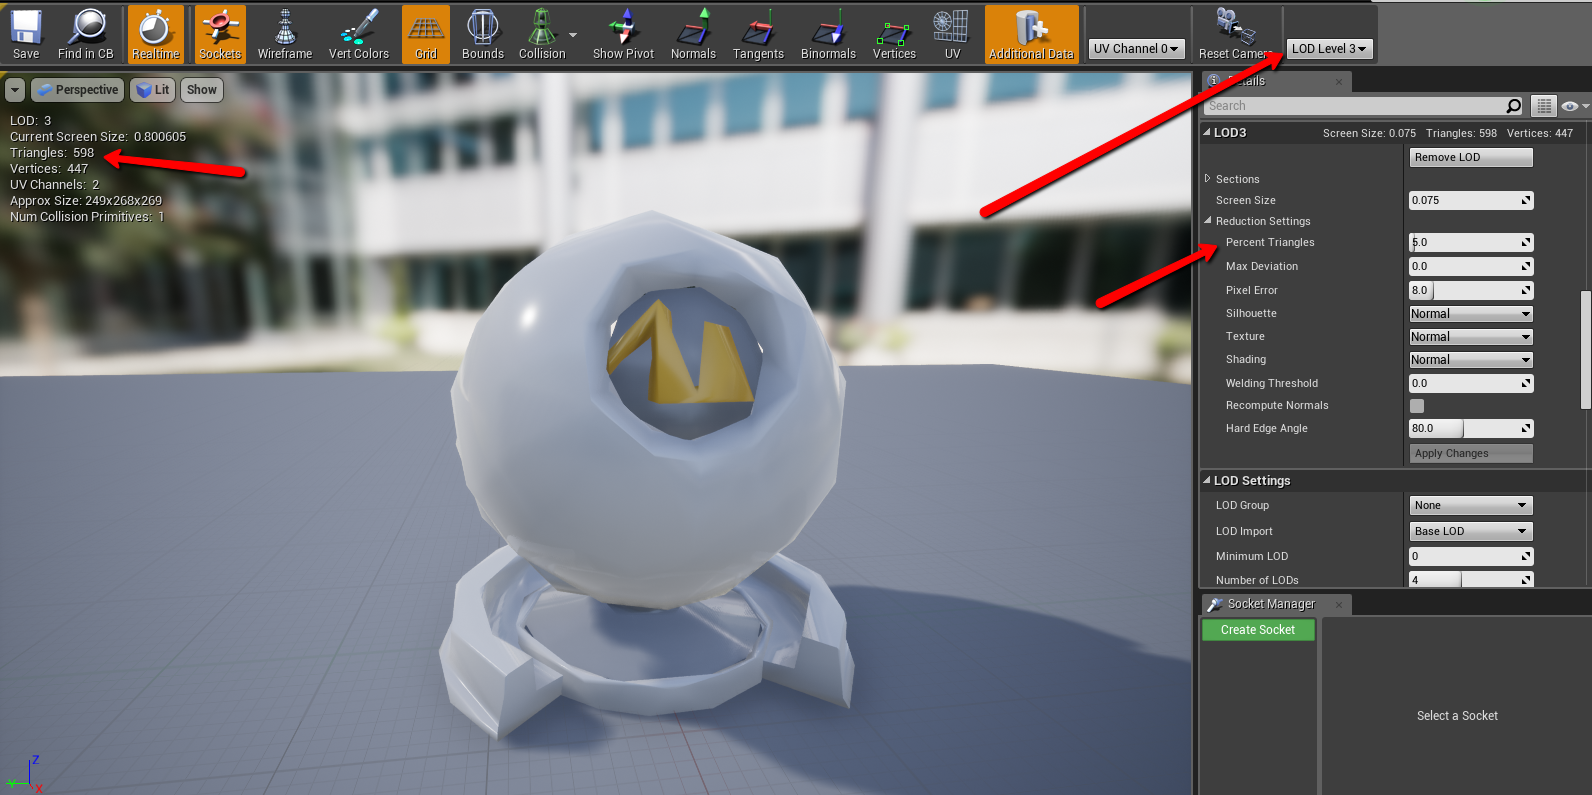
It’s definitely not the prettiest, but from really far away the player is unlikely to notice.
So now that we’ve set up LODs for our mesh the performance should be immediate. The reason why I started you out last step with a hierarchical instanced static mesh instead of just a static mesh is that hierarchical instanced static meshes compute distances for LODs. Truth be told we could have probably picked up a few frames last step if we had just used a instanced static mesh, but it would not have been much and we wouldn’t have been able to do this step.
So now let’s go back to our blueprint placed in the game world.
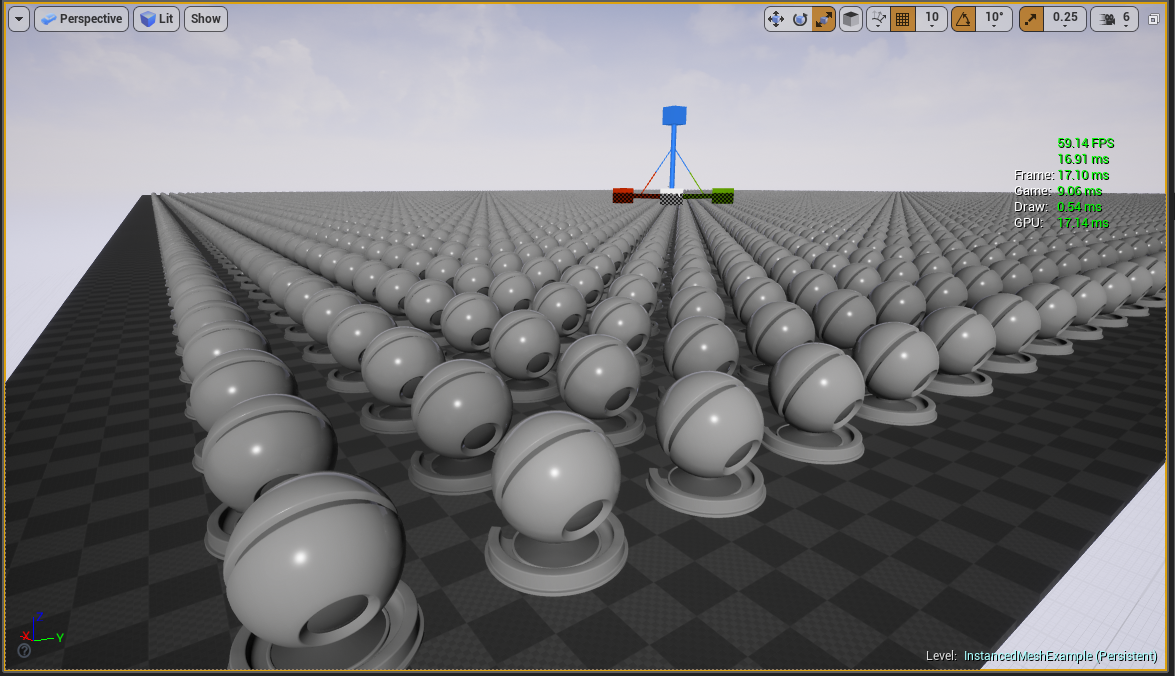
You’ll now notice that even with all of those meshes we are getting about 60 FPS in the editor. We’d be getting even more with a packaged version of the game. You’ll also notice that we haven’t lost much visual fidelity, if any at all. Maybe you’ve got better eyes than mine, but I can’t figure out, just by looks, which versions of the mesh are which. If you really wanted to be able to tell though there’s a tool for that.

Just go into the view mode options and turn on “Mesh LODs”.
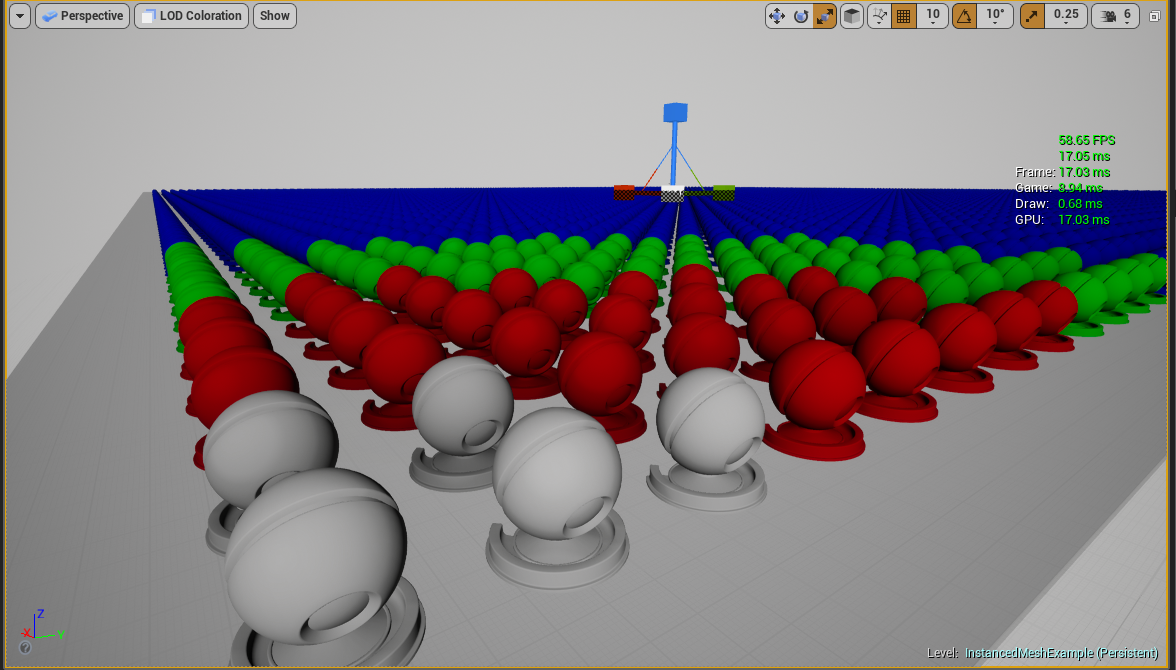
… And tada! Unreal will color them for you, with grey being LOD0, Red being LOD1, and so on.
So there you have it. 1000 relatively complex meshes on-screen at one time running at 60 fps, thanks to hierarchical instanced static meshes and LODs. I hope this tutorial helps you. If you have any questions or comments feel free to leave them bellow.
back to blog