The Paint By Numbers Approach
August 18th, 2015
Assuming I knew exactly what I’m doing (I don’t) and assuming I had a team of people working on this game (once again I don’t), it would still take quite a long time to finish everything that’s in my design doc. I have to make allowances for some things to not be as great as I would like. One of the areas I have found that takes me the most amount of time is modelling. There are a ton of assets that are going to be required for this game to work the way that I would like. Many developers have started using pre-made assets purchased online in order to cut out a huge amount of time. I actually have quite a large collection of art assets I purchased from the unity asset store when I was still working in Unity. The problem that I’ve found and I’m sure that others have found as well, is that if you use too many pre-made assets your game looks like a mess. There’s no coherence. All the assets were made independently of each other, by different artists and with no central theme. they can make game look extremely disjointed and sloppy, but I may have found a solution.
For Project Zeds my art inspiration is the films of Henry Selick and Tim Burton, Specifically the stop animation films they have done. I want the exaggerated shapes and outlines but I want realistic looking textures. The props in those stop animation films are all real props. They have real textures to them and react to light in a realistic way. So I need my assets to do similarly.
I’ve found that I can get a decent coherent art style by taking toon art assets from the asset store, minimally modifying the mesh and then completely re-texturing it. By choosing toon assets I already start with a pretty exaggerated shape. I then alter the mesh a little, sometimes purely so I have more room in the UV’s for the re-texturing and then pull the mesh into substance painter. There I divide the mesh into the different physical materials I need and take a very “paint by numbers” approach to how I re-texture it.
I’ve really started to fall in love with Substance Painter. The workflow is intuitive, the results are great, and the amount of time it takes to texture an asset is almost nothing. They even have it on a rent-to-own type subscription plan, so it doesn’t break the bank. I highly recommend it for anyone doing PBR.
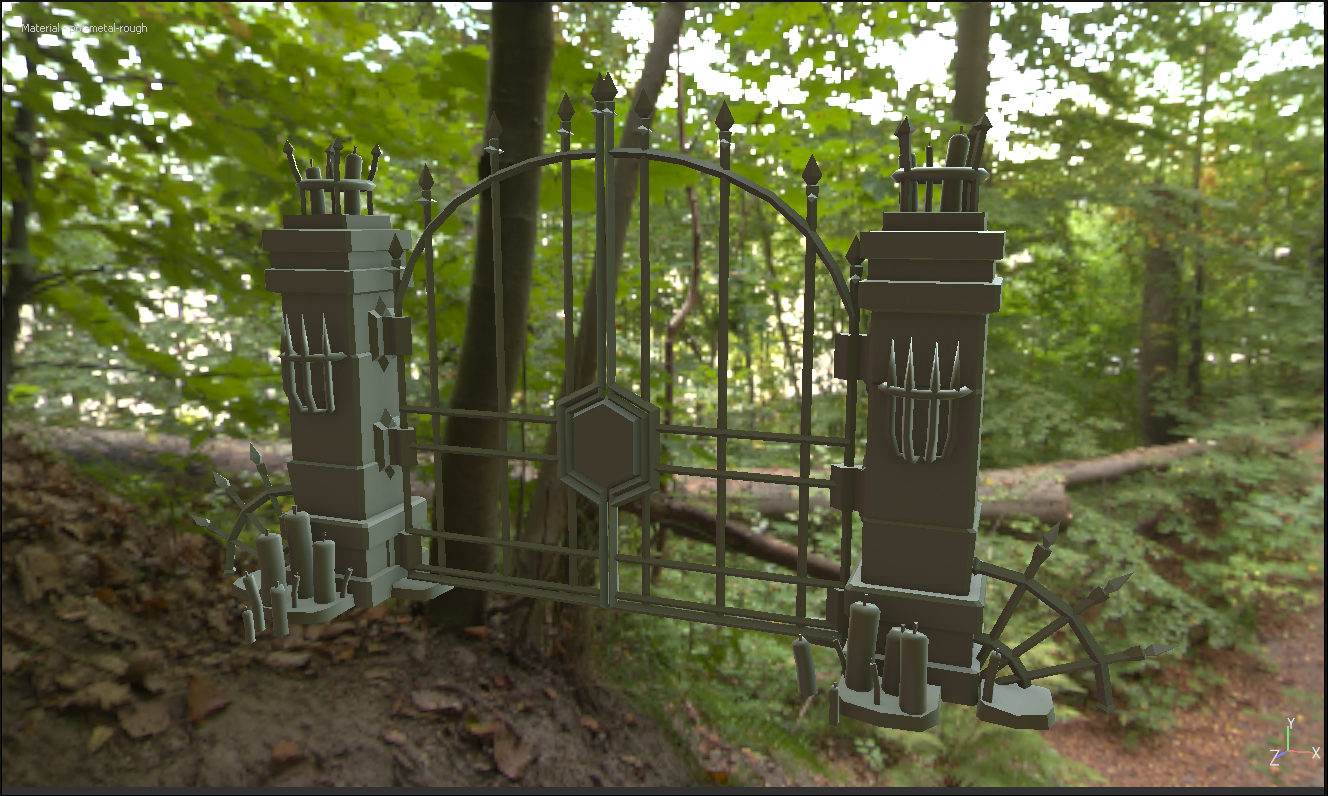
Anyways, let me walk you through my texturing process. First I start with the toon asset straight from the Unity Asset Store.
I then remove all of the textures and two-dimensional geometry. All of the detailed geometry in this gate is actually drawn on a 2-D plane that runs through the middle of the model. That won’t work in a game like Project Zeds so it will have to be removed. Luckily enough the gate looks alright without it. I also redo the Uv’s. This asset was originally made to work with a small corner of a texture atlas but I need more detail in this asset for an FPS, and I need the UV’s to never overlap due to how Unreal engine handles light maps. I can quickly fix all that in Modo though.
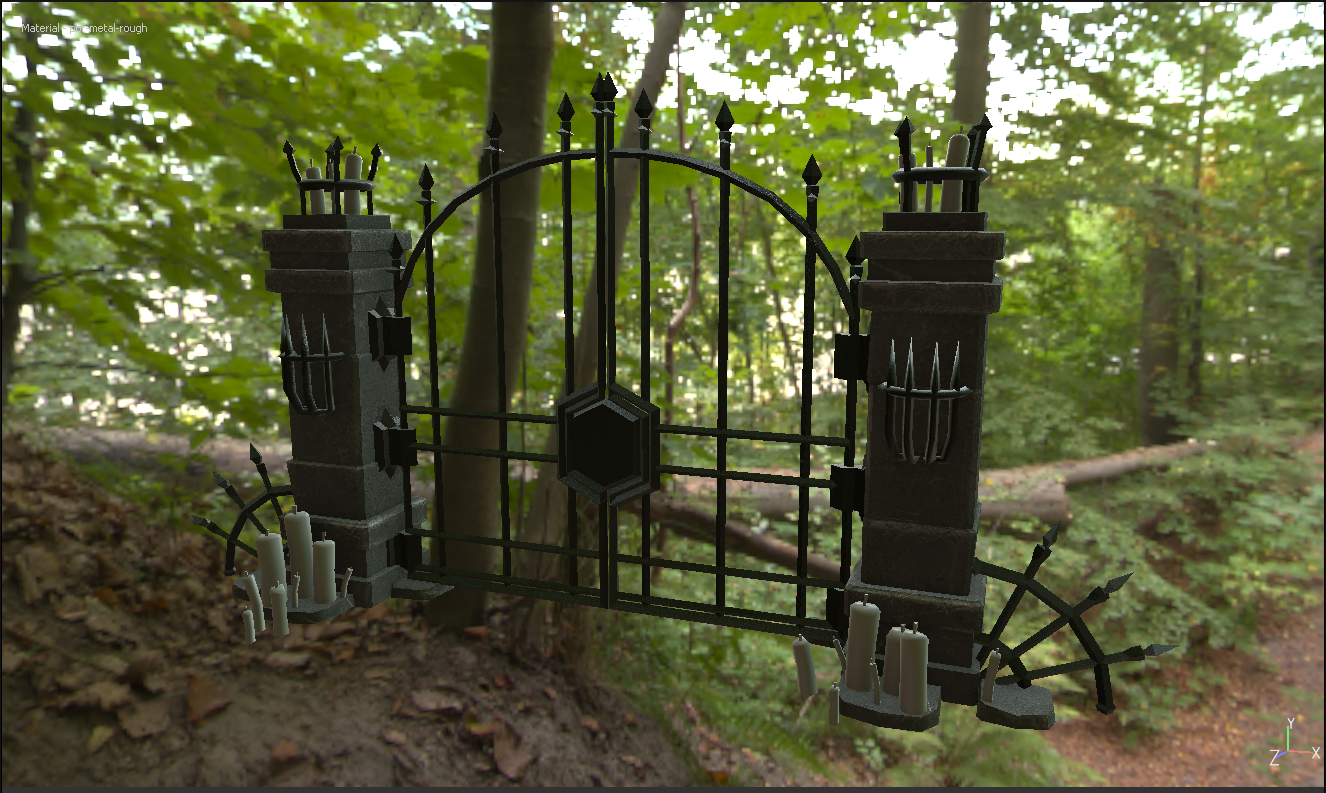
Now that I’ve got a clean blank mesh to work with I create two groups, one for the iron bars and another for the concrete. I give them both blank masks and then I simply start painting in the lines by Using substance painter’s UV island selection tool to assign different parts of the mesh to each of these groups. I give them both very simple materials so I can tell which is which.
Now I duplicate the concrete base layer and lighten it a little. I use a generator to generate a mask for this new layer so that only the edges of the mesh get this new color. It gives a great edge wear effect.
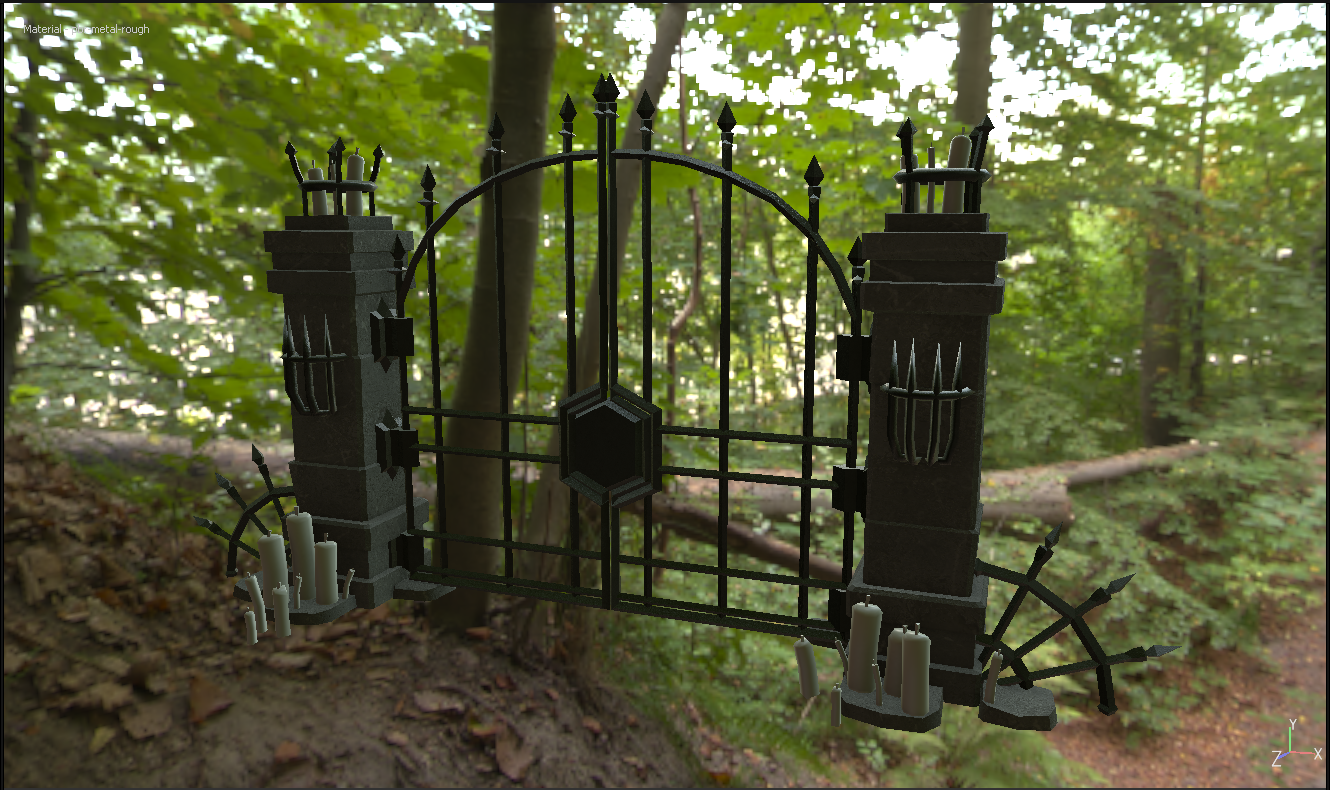
Next I start adding in detail. It may be hard to see from the image but I add in small imperfections, cracks and flaws. Substance painters particle tools are great for this. Pick a fracture brush. turn the particle life way down and set the normal value in the negative and you’ll get a pretty good effect. I added a layer of rust to all the iron bars as well using a similar method to the one I used for the edge wear on the concrete. I also added a wax texture to the candles in this round.
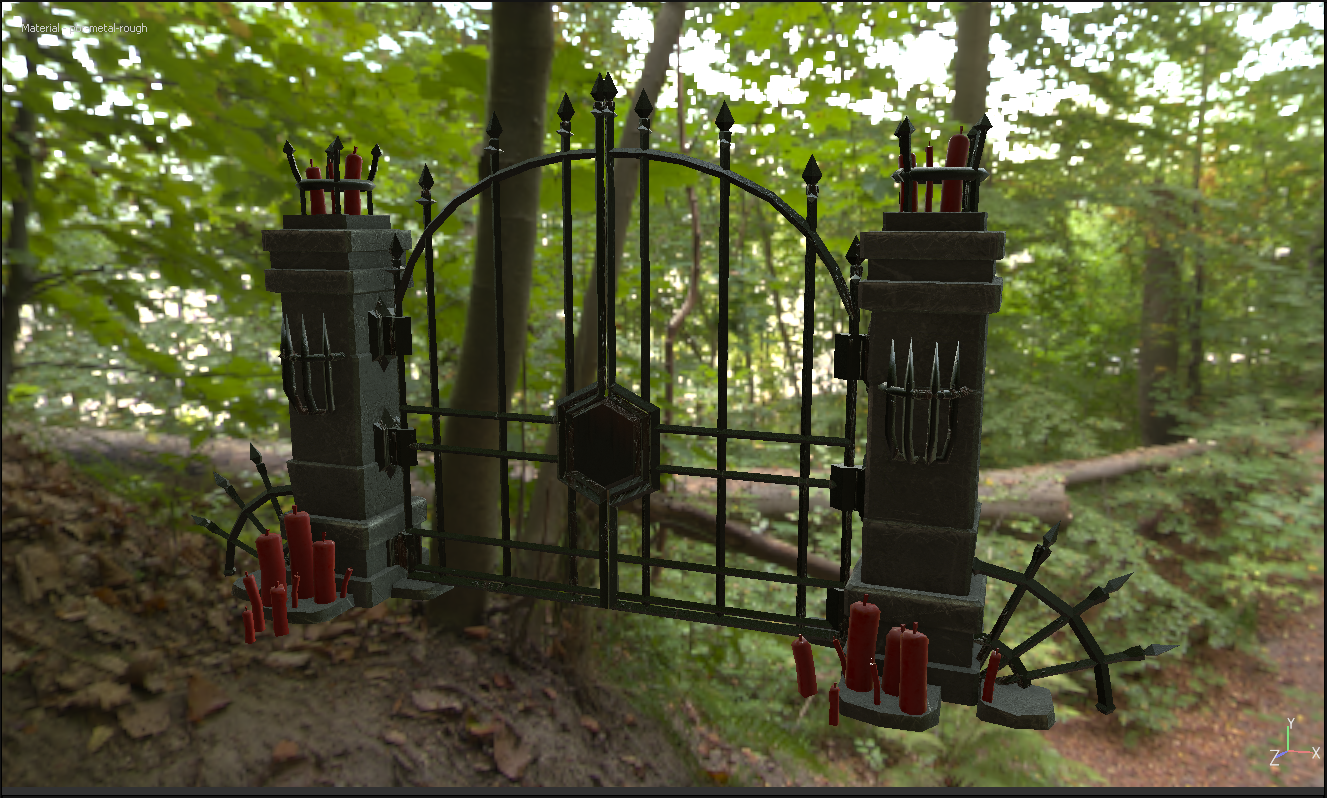
Finally I do one last pass to add details. This time I add dripped wax at the base of all the candles using a particle brush. I added ground dirt to the lower sections of the mesh and added a thin layer of dirt to the entire mesh.
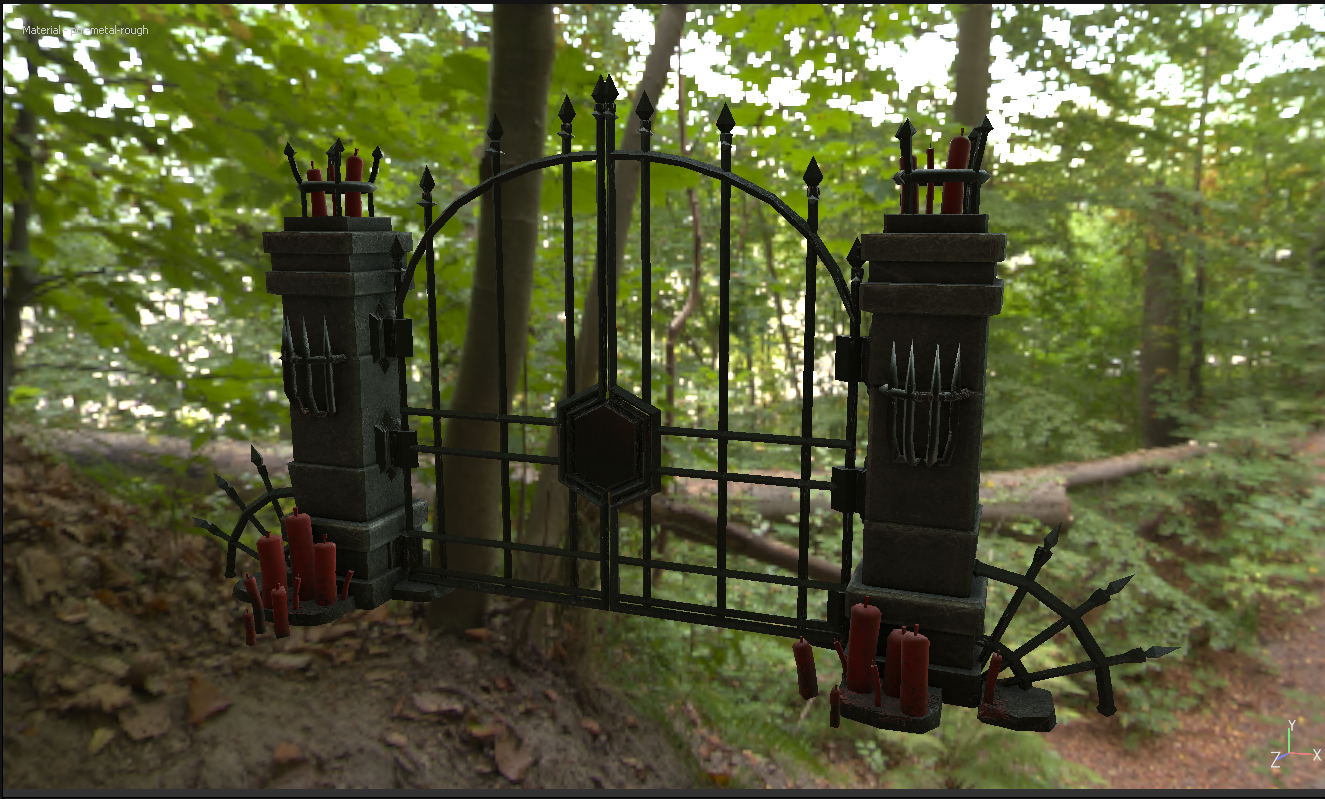
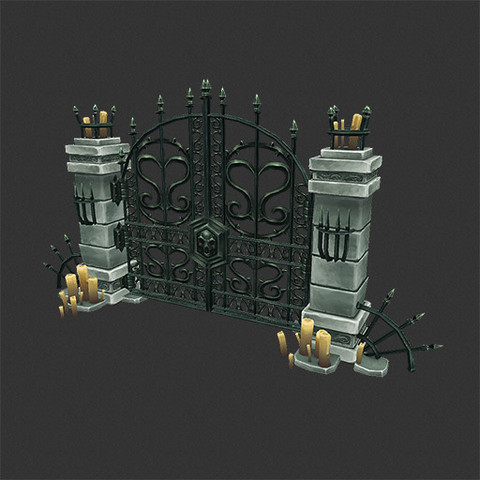
The final result isn’t amazing, but it is usable and the art style is much much closer to what is already in-game and looks almost nothing like it’s original asset. Most importantly though, from beginning to end this whole workflow only took a few hours, and I feel as I get more experienced with it I’ll start getting better results with less time invested. I hope this helps others out there who have to use pre-made assets in order to finish their games.
back to blog